- Prerequisites
- Clone a remote project
- Select an active project
- Select an active branch for a project
- Pull project changes
- Create and submit changelists
- Next steps
Use the WVS Desktop Client
This page shows you the workflows supported by the WVS Desktop Client, which is a version control tool designed for non-technical users. The WVS Desktop Client supports the following workflows:
- Clone remote projects.
- Select an active project.
- Pull project changes.
- Create and submit changelists.
Prerequisites
Before you can perform the steps on this page, ensure that you have completed the tasks on Prepare to use WVS, which includes the following tasks:
- Register for a WVS account.
- Install and initialize WVS tools.
Clone a remote project
Cloning is copying a remote project on WVS to your local workstation. This section shows you how to clone a project from WVS to your local workstation so you can start working on it.
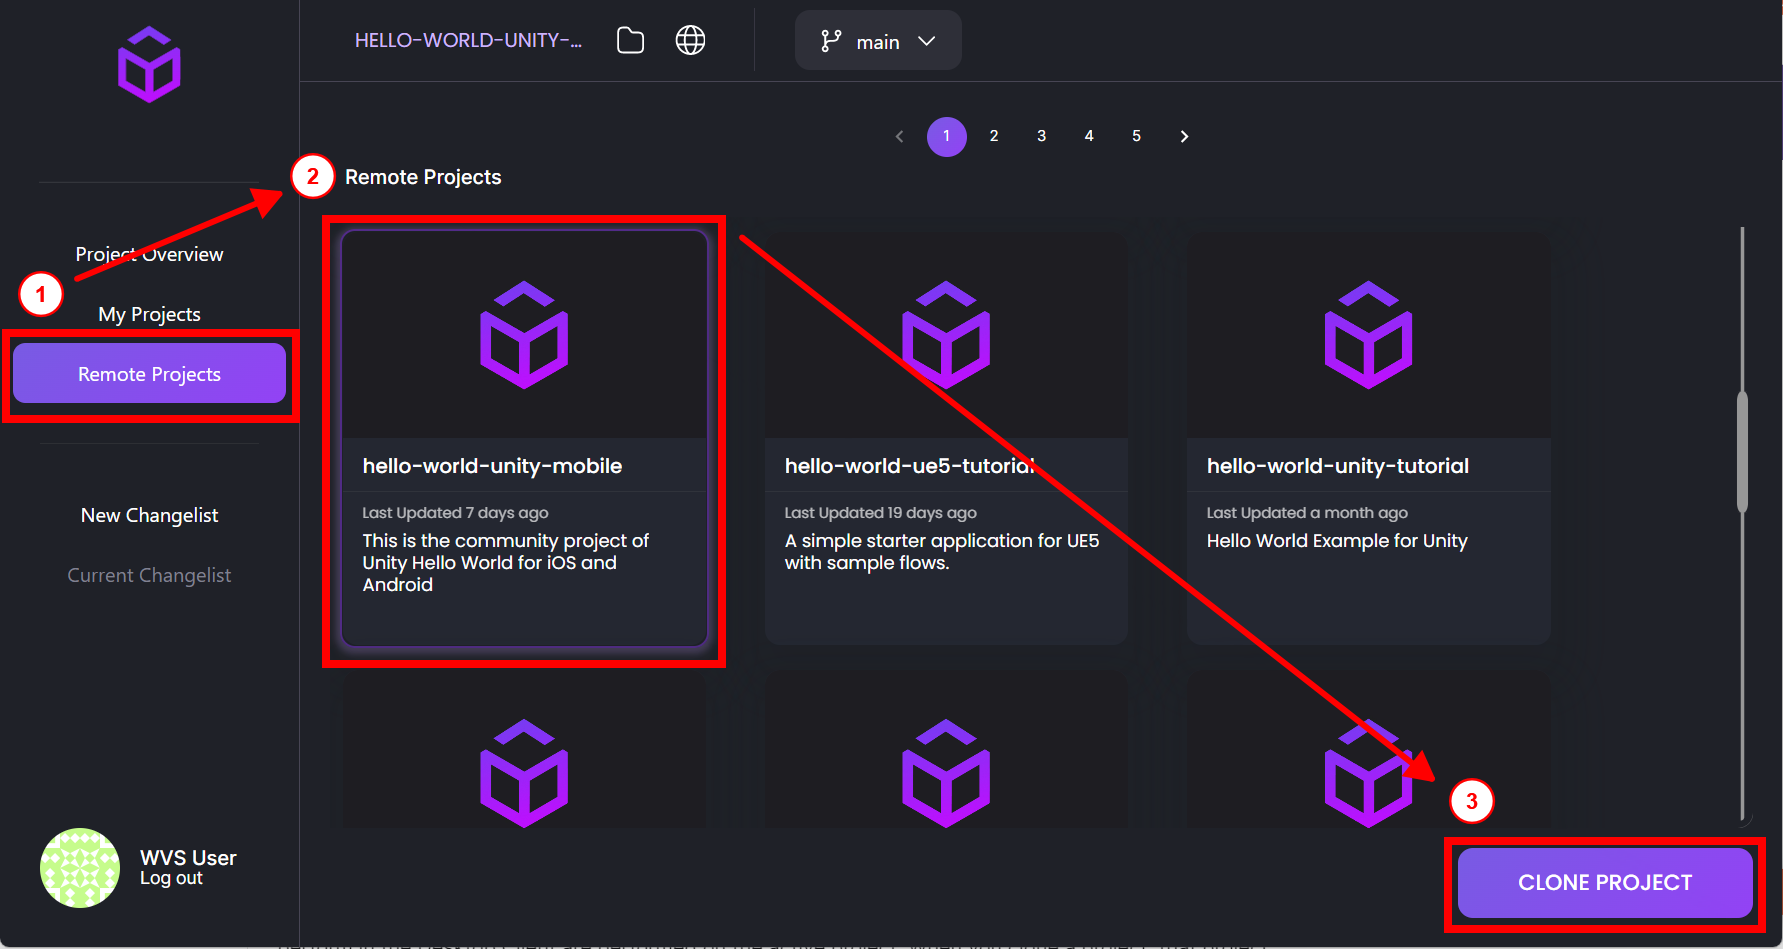
- Open the WVS Desktop Client.
-
In the navigation pane, click Remote Projects.
This page displays all WVS projects that you have access to.
- Select the project that you want to clone.
- Click Clone Project.
- In the window that pops up, specify the location on your workstation where you want to clone the project. For example,
c:\wvsProjects\. - Click Clone Project.
Depending on the size of your project and your internet connection, the project can take some time to finish cloning. Once the cloning is complete, the cloned project becomes the active project in the WVS Desktop Client.
Select an active project
The active project is the project that you’re currently working on in the WVS Desktop Client. All actions that you perform in the Desktop Client are performed on the active project. When you clone a project, that project automatically becomes the active project when the cloning completes.
Identify the active project
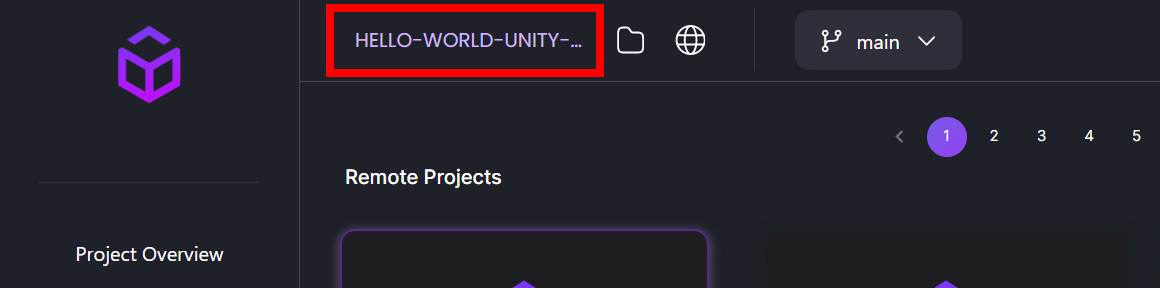
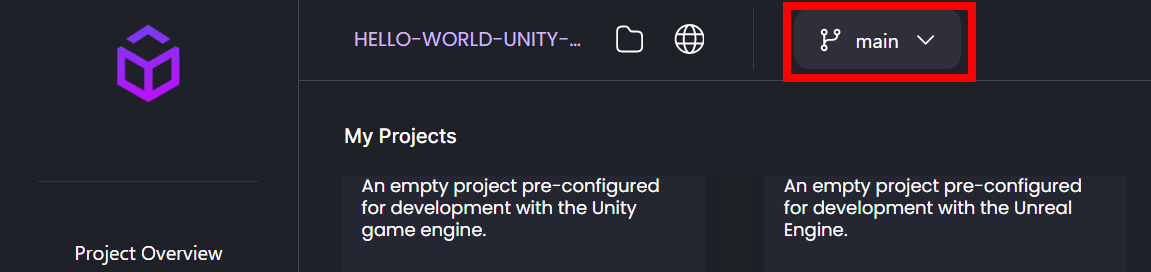
To identify which project is the active project, open the WVS Desktop Client. The name of the active project is displayed at the top next to the folder and globe icons.
Change the active project
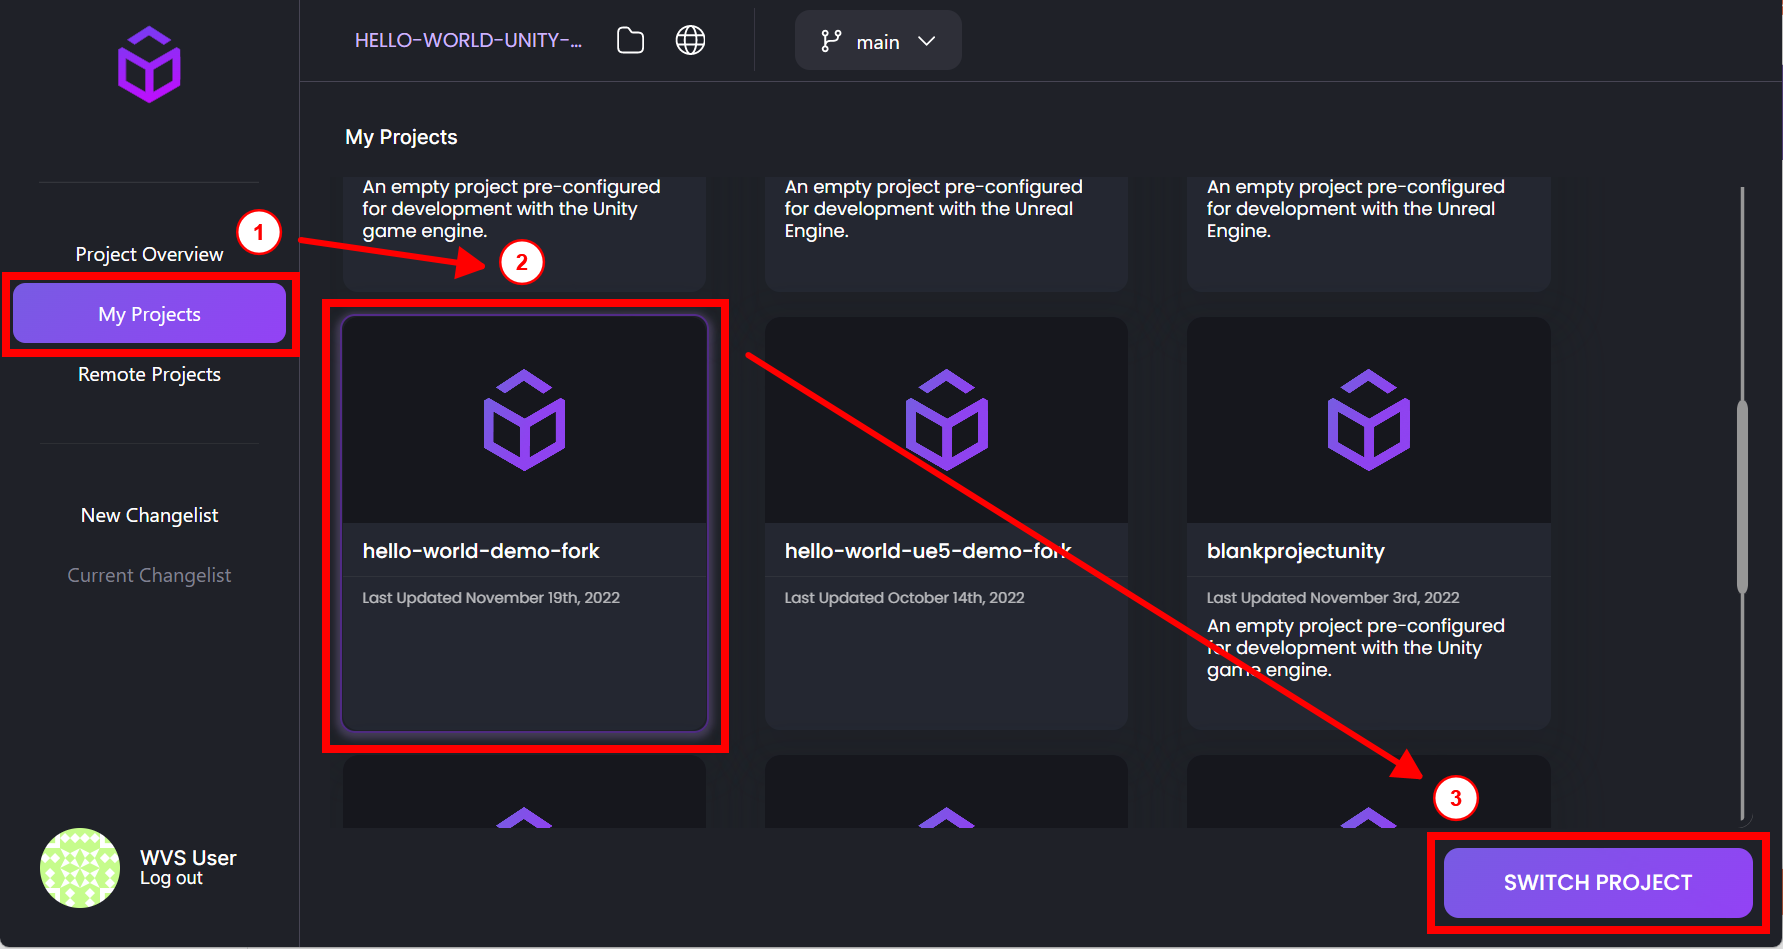
- Open the WVS Desktop Client.
-
In the navigation pane, click My Projects.
This page displays all of your cloned projects.
- Select the project that you want to work on.
- Click Switch Projects.
Select an active branch for a project
A branch is a divergent path of development from the main line that doesn’t affect the main line. Branches are useful for grouping a set of related changes that later gets merged into the main branch.
When working on your project with multiple branches, ensure that the branch you want to make changes to is selected in the WVS Desktop Client:
- Open the WVS Desktop Client.
- Click the branch selector box next to the globe icon at the top.
- Click the branch that you want to work on from the dropdown list.
Pull project changes
The cloned project on your workstation must regularly pull from the project repository to remain in sync with the latest changes that others have committed. This ensures that you’re always working with the most recent state of the project.
Pulls are automatically performed alongside other actions that you perform on the WVS Desktop Client, like when you create changelist, submit a changelist, and switch projects. If you don’t regularly perform these actions, you can also manually pull changes by performing the following steps:
- Open the WVS Desktop Client.
-
Ensure that the project and branch you want to pull are active.
For example, if branch
mainis active, you would be pulling in changes from themainbranch in the repository to your localmainbranch. -
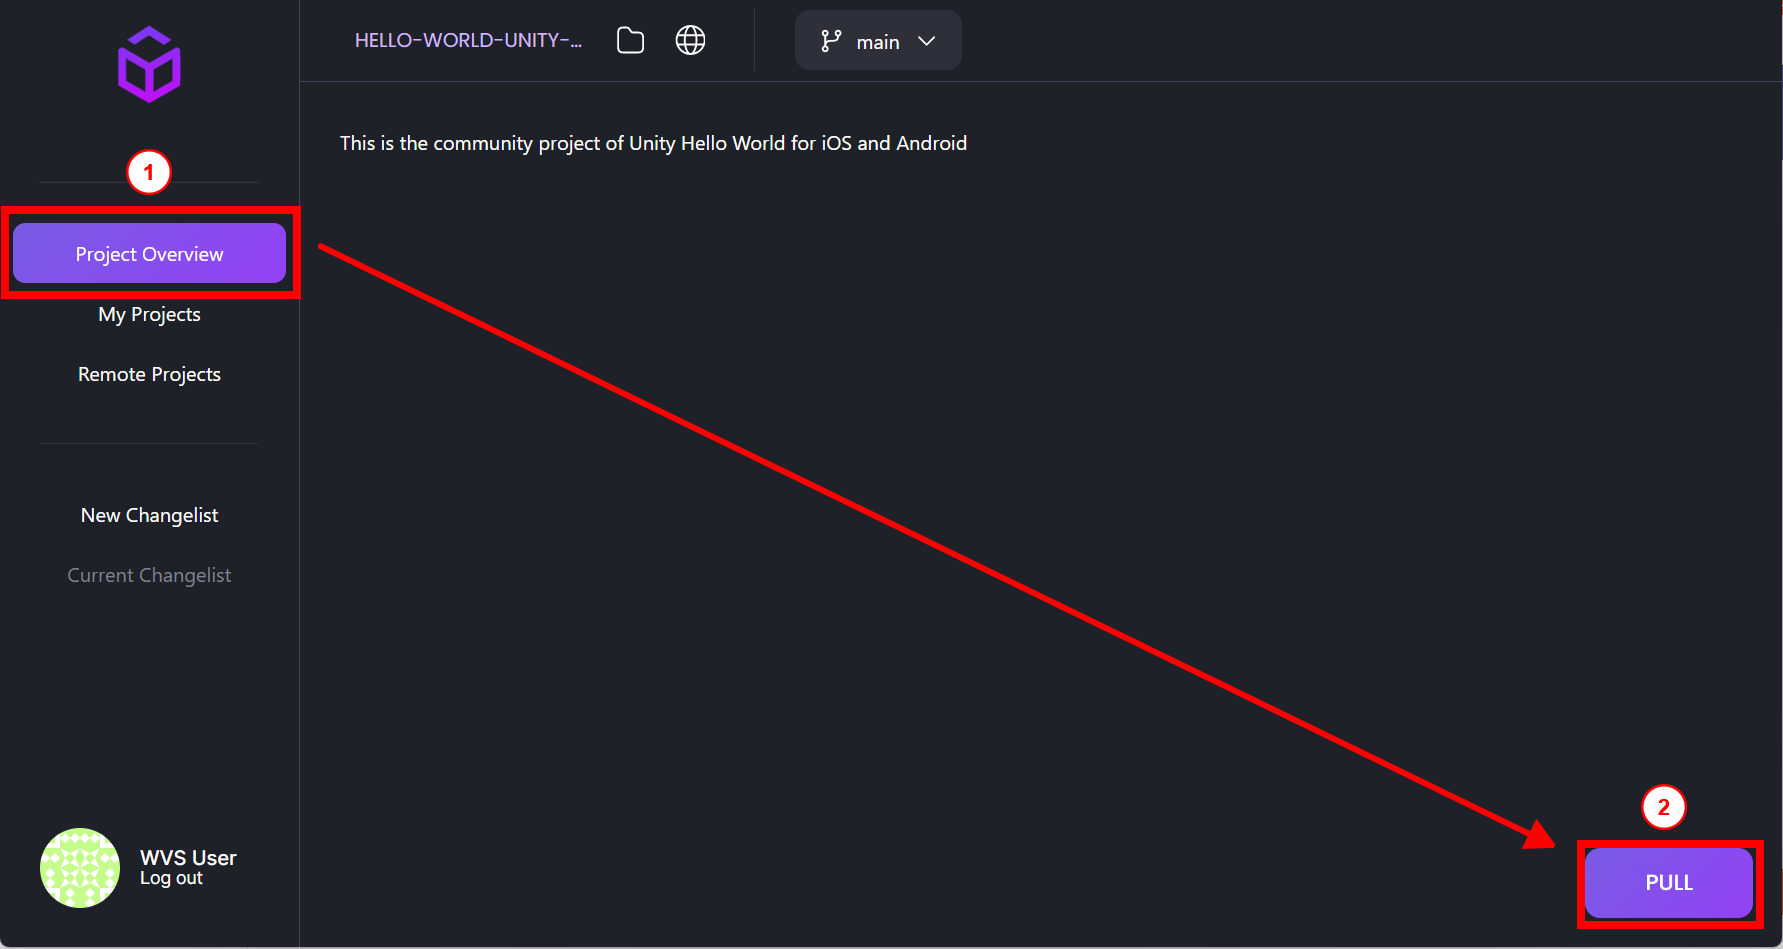
In the navigation pane, click Project Overview.
This page displays the description of the active project.
-
Click Pull.
Once the pull is complete, the selected branch of your cloned project is synced with the latest changes of the project on WVS.
- Click Ok.
Create and submit changelists
A changelist is a list of files that you’ve made changes to in your cloned project that haven’t been committed to the project repository. These changes include creating files, deleting files, and changing existing files. WVS automatically detects your local changes and adds the changed files to the changelist.
Change organization
You can use changelists to group changes to multiples files in a meaningful way by giving it a descriptive name and adding a description of the changes that you made.
File locking
When working on binary files, it is essential that you lock the files so that others can’t modify them at the same time. You can specify the files that you want to lock when you create a new changelist. Once you submit the changelist, the locks are automatically removed. Note that not all projects are configured for locking workflows.
Create a changelist
- Open the WVS Desktop Client.
- Ensure that the project and branch you want to work on is active.
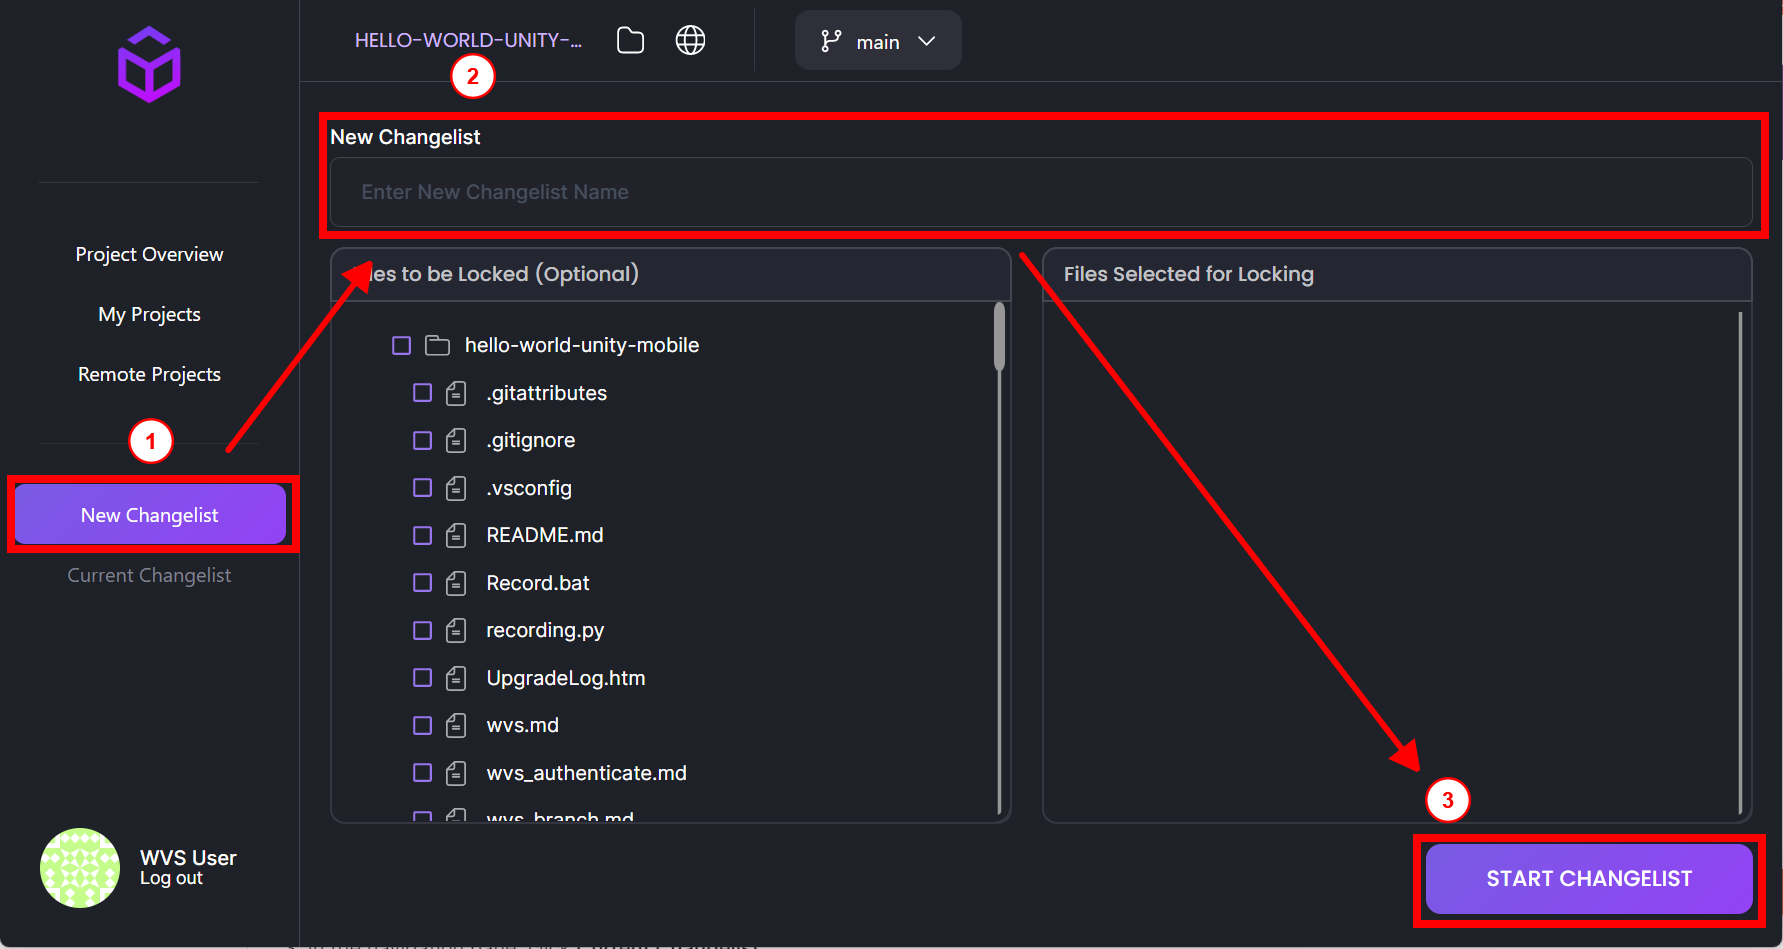
- In the navigation pane, click New Changelist.
- Enter a descriptive name for the changelist.
- Optional: Under Files to be Locked, select the checkbox next to the files that you want to lock.
- Click Start Changelist.
-
Optional: Under Changelist Notes, add a description of the changes you are making.
Note: Adding a trigger string to the Changelist Notes triggers the associated flow when you submit the changelist.
As you make changes to your cloned project, the changed files are automatically added to the Modified Files section.
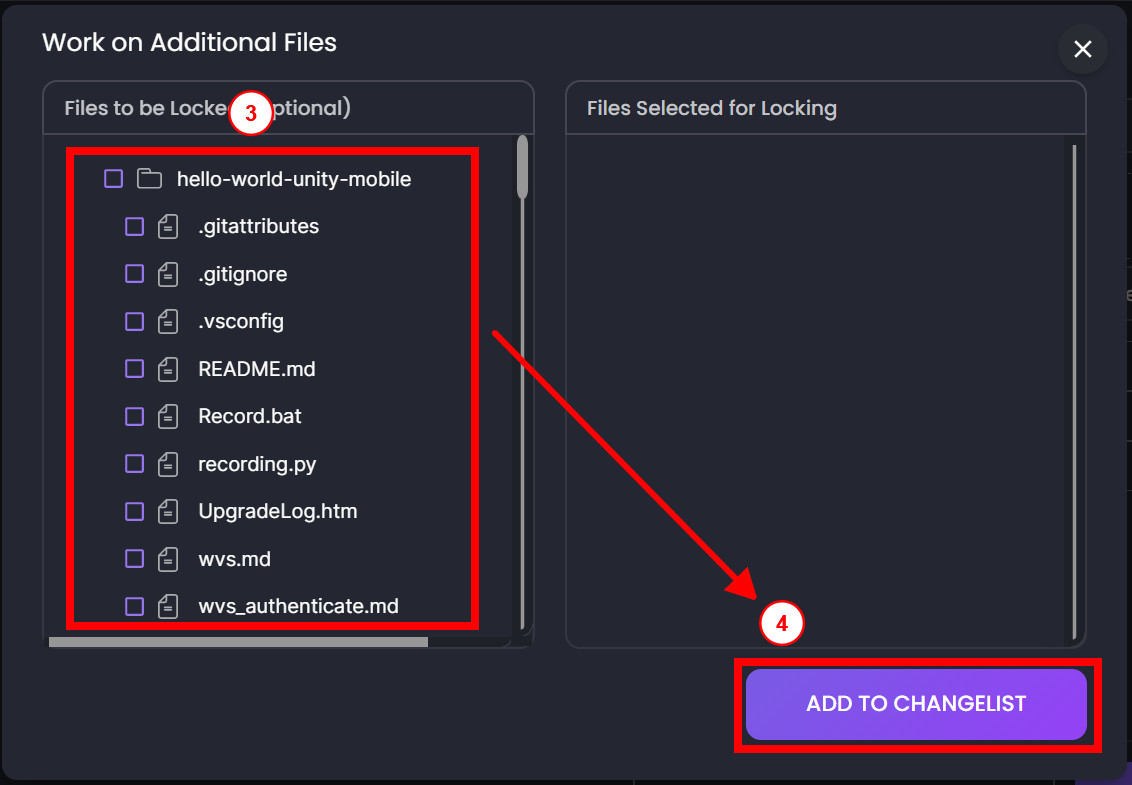
Lock additional files
After you’ve created a changelist, if you want to lock additional files, perform the following steps:
- Open the WVS Desktop Client.
- Ensure that the project and branch you want to work on is active.
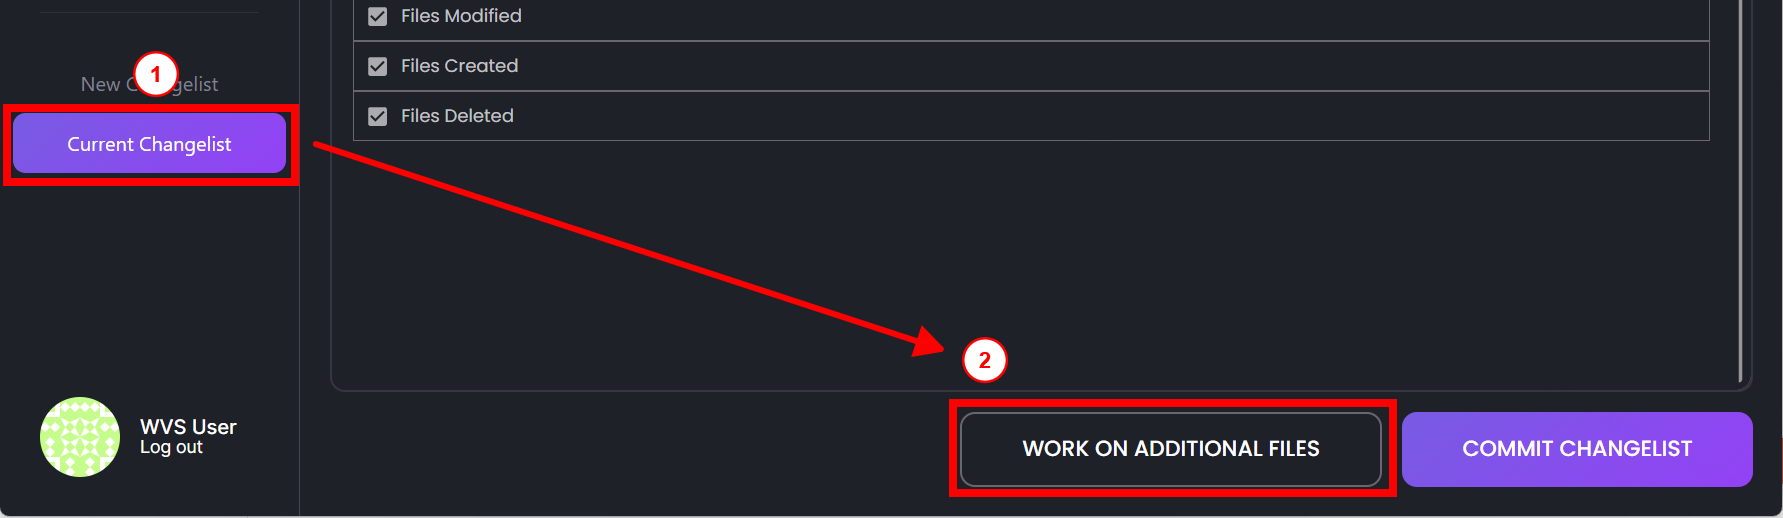
- In the navigation pane, click Current Changelist.
-
Click Work on additional files.
The files that are currently locked are listed under Files selected for locking.
- Select the checkbox next to the files that you want to lock.
-
Click Add to changelist.
Submit a changelist
- Open the WVS Desktop Client.
- Ensure that the project and branch you want to work on is active.
- Click Current Changelist.
- Click Commit Changelist.
- Click Push Changelist.

Once the changelist is submitted, any files that are locked by the changelist are unlocked.
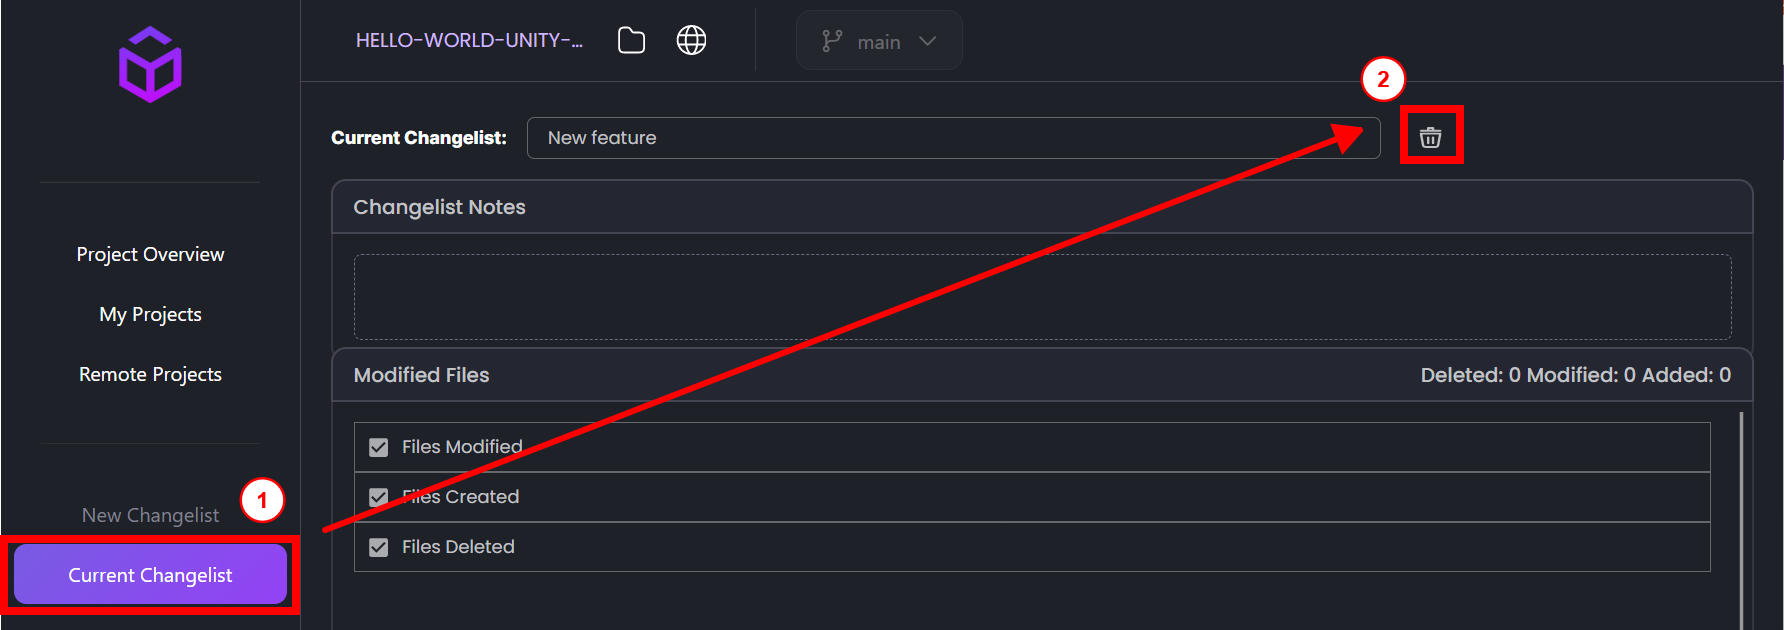
Delete a changelist
Deleting a changelist reverts all unsubmitted changes that you have made to your project files since the changelist was created. However, any new files that you created will not be deleted.
- Open the WVS Desktop Client.
- Ensure that the project and branch you want to work on is active.
- Click Current Changelist.
- Click the delete icon next to the changelist name.
- Click Ok.
Once the changelist is deleted, any files that are locked by the changelist are unlocked.
Next steps
- Try the Hello World tutorials.