- Prerequisites
- List project flows
- Add the
archive_zipflow to your project - Validate flow configurations
- Configure flow variables
- Trigger the flows
- Check flow running status
- View and download flow outputs
- Next steps
Add flows to automate project builds
This Hello World tutorial shows you how to add a flow to your project using the hello-world-demo-fork project as an example. Flows are units of automation that perform common tasks in your project whenever a triggering condition is met. The flow that you add in this tutorial automatically creates a zip archive of its configured input.
Prerequisites
You have completed the Fork and clone a project tutorial.
List project flows
When you fork an existing project, all flows that are added to that project are also included in your forked copy. List the flows that are added to your project by performing the following:
- On your local workstation, open Command Prompt:
- Open Run by pressing Windows+R.
- Enter
cmdin the Run text box. - Click Ok.
The Command Prompt window opens.
-
In Command Prompt, navigate to the local directory of the
hello-world-demo-forkproject, for example:cd C:\wvsProjects\hello-world-demo-fork -
List project flows by running the following command:
wvs flow statusThe command returns something like the following:
C:\wvsProjects\hello-world-demo-fork>wvs flow status

  Instance Name         Registry Name               Ctgry       Enabled
---------------------------------------------------------------------------------------
  DevBuildLinux         Linux Dev Build             build       false
  WindowsBuild          Windows Dev Build           build       true
OK

C:\wvsProjects\hello-world-demo-fork>_
In this example, the project has two flows added:
DevBuildLinuxandWindowsBuild. SinceDevBuildLinuxis disabled, onlyWindowsBuildgets triggered when a change is submitted. TheWindowsBuildflow creates a build of your project for Windows everytime a change is committed to your project.
Add the archive_zip flow to your project
WVS has a registry of flows that you can add to your project. Add the archive_zip flow from the flow registry by performing the
following:
-
List the flows in the flows registry by running the following command:
wvs flow registryThe command returns a list of availabe flows like the following:
C:\wvsProjects\hello-world-ue5-demo-fork>wvs flow registry Flow Name Description ----------------------------------------------------------------------------- archive_zip Zip a set of input artifacts into a single output artifact. build_godot_android Build for Godot projects targeting Android. build_godot_web Build for Godot projects targeting Web . build_godot_windows Build for Godot projects targeting Windows. build_ue_game_linux Basic Build for Unreal Engine projects targeting Linux. build_ue_game_quest Basic Game Build for Unreal Engine projects targeting the Oculus Quest. build_ue_game_ship_windows Shipping Game Build for Unreal Engine projects targeting Windows build_ue_game_test_windows Test Game Build for Unreal Engine projects targeting Windows build_ue_game_windows Development Game Build for Unreal Engine projects targeting Windows. build_unity_android Android build for Unity build_unity_ios iOS Build for Unity build_unity_webgl WebGL Build for Unity build_unity_windows Windows build for Unity deploy_oculus Deploy a build to a channel in your Oculus developer account. deploy_s3 Deploy an artifact to an S3 bucket of the user's choice deploy_testflight_ios iOS deployment to TestFlight page_album Creates pages album from set of images page_album_sxs Creates side by side pages album from 2 sets of images render_ue_mrq_still Unreal render stills from Movie Render Queue object report_git_inspector Output a pages report with git statistics on this project. report_git_stats Output a pages report with git statistics on this project. OK C:\wvsProjects\hello-world-ue5-demo-fork>_ -
Add the
archive_zipflow to your project by running the following command:wvs flow add archive_zip
Validate flow configurations
Check if the flows in your project are properly configured by running the following command:
wvs flow validate
If all flows in your project are properly configured, the command returns OK. Otherwise, the command returns something like the
following:
C:\wvsProjects\hello-world-ue5-demo-fork>wvs flow validate
Error: Variable 'INPUT1' is required in 'archive_zip_1'
Flow instance validation failed

C:\wvsProjects\hello-world-ue5-demo-fork>_
In this case, the archive_zip_1 that was added to the project in the previous step requires its INPUT1 variable to be configured.
Configure flow variables
Flows need to be configured and connected in order to deploy correctly.
The name you would use to connect your flows should be the Instance Name.
Example:
wvs flow connect InstanceName1 to InstanceName2
To ensure you are using the correct names when you’re connecting flows, run the following command to get a list of the flows currently in your project.
wvs flow status
Expected results should look something like this:
    Instance Name         Registry Name               Ctgry       Enabled
   ---------------------------------------------------------------------------------------
     archive_zip_1        archive_zip                 build       true
     WindowsBuild         Windows Dev Build           build       true
For the current example, the archive_zip_1 flow, which is an instance of the archive_zip flow, takes an input and creates a zip archive of that input. In this tutorial, we want to create a zip of our project build, which is the output of the WindowsBuild flow. To make the output of WindowsBuild become the input of archive_zip, run the following command:
wvs flow connect WindowsBuild to archive_zip_1
--help to the end of any command, if you’d like additional information.wvs flow connect --help
Trigger the flows
By default, project flows are triggered whenever a change is submitted in the project.
-
Go to the WVS project dashboard.
- Search for the
hello-world-demo-forkproject. -
Click on the project name.
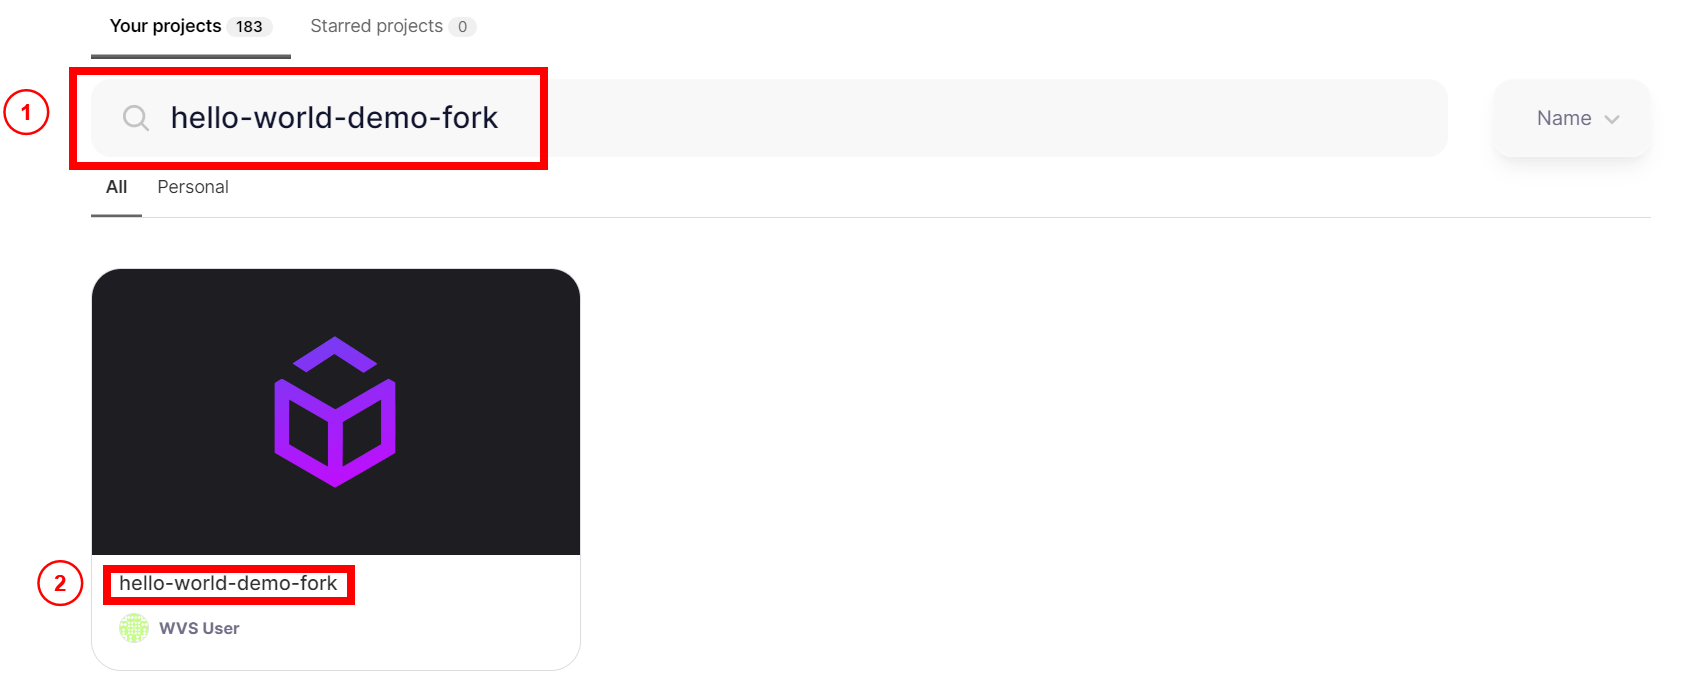
The WVS Web Client for the project opens.
- Click Version control > Files.
-
Click
README.md.
-
Click the dropdown next to Open in Web IDE and select Edit.
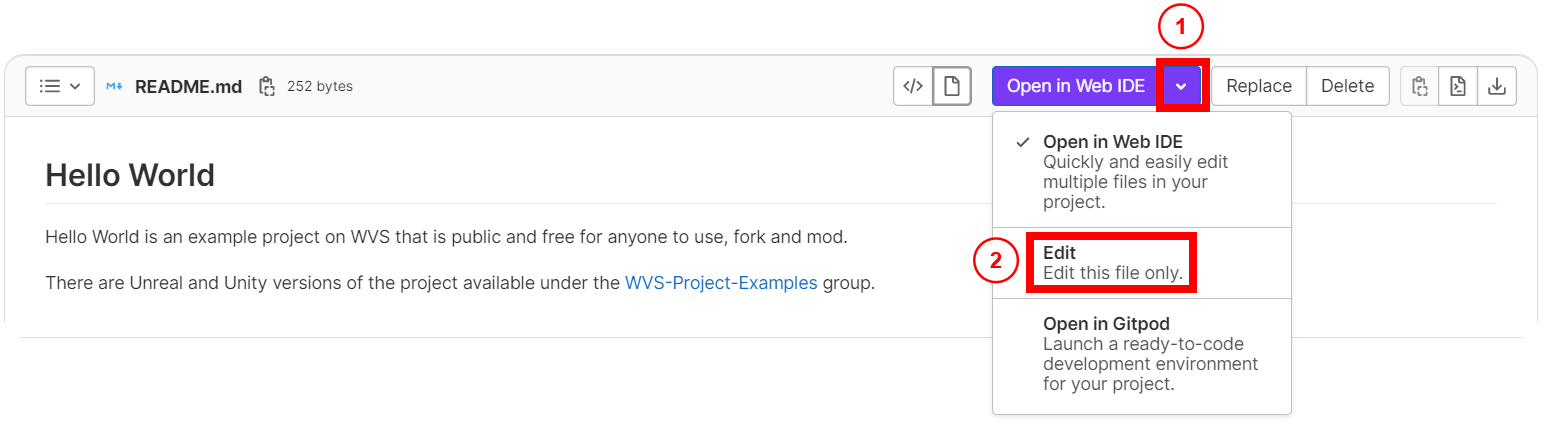
- Click Edit to start editing
README.md. - Add a period at the end of
An example Hello World project for UE5or make any other change. -
Click Commit.

Committing a change to any file in the project repository triggers the flows to run.
Check flow running status
You can check progress of your pipelines in the WVS Web Client by clicking Flows > Pipelines.

To check the status of individual flows in the pipeline, click the pipeline ID number.

View and download flow outputs
When your pipeline has a status of Passed, you can download your pipeline outputs by performing the following:
-
In the WVS Web Client, click Outputs > Builds.

-
Click the Download icon under Actions.
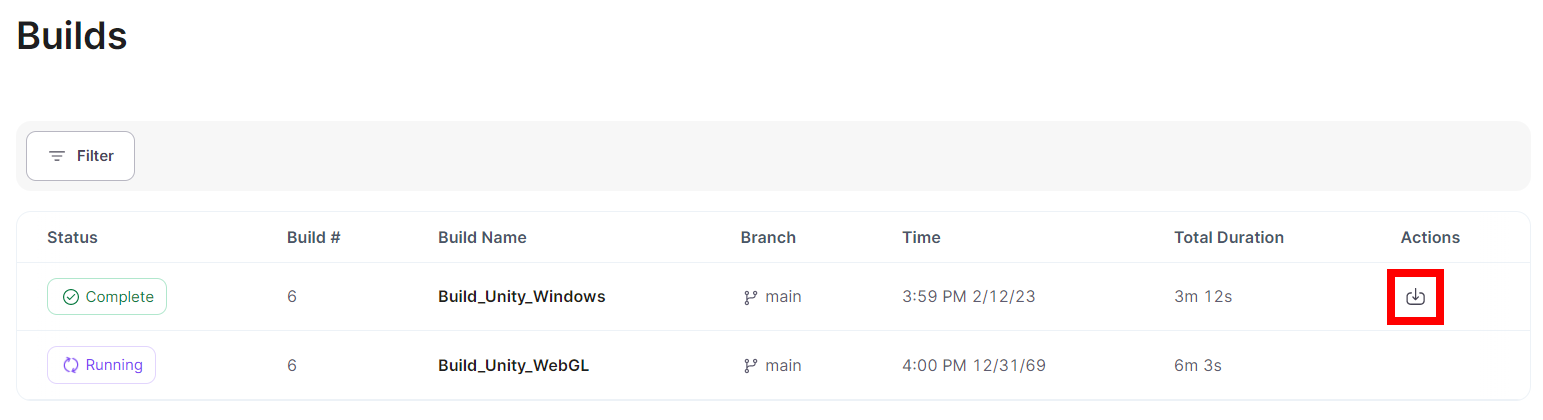
Notice that the build artifacts are downloaded as a zip file.
Next steps
- Try the other “Hello World” tutorials:
- Learn more about flows.
- Try a build and deploy tutorial for one of the following platforms: