Working in Unreal Engine with the WVS plugin
Changelists
A changelist is available by default and is labeled default. Any changes made will show in your default changelist. A default changelist can be used to submit or commit your changes to your remote repo.

Additionally, the WVS Unreal plugin supports an unlimited amount of changelists that can be created manually. Changelists can be created to help you organize your work-in-progress, allowing you to separate what you want to submit from what you want to continue working on.
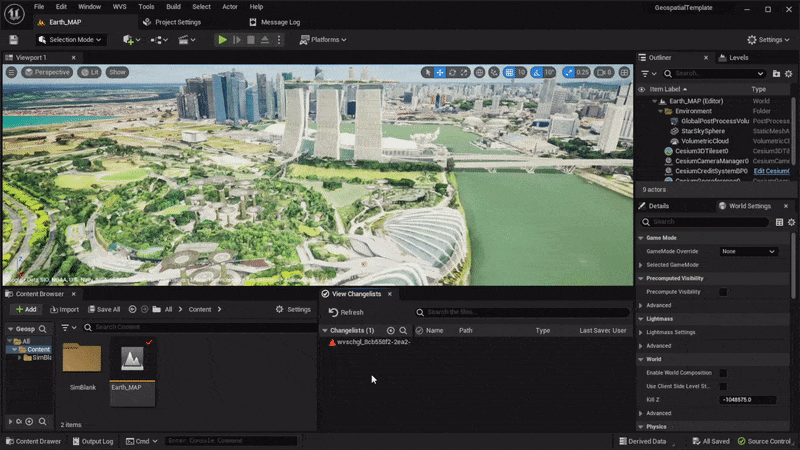
To create additional changelists, click the + icon in the View Changes window.
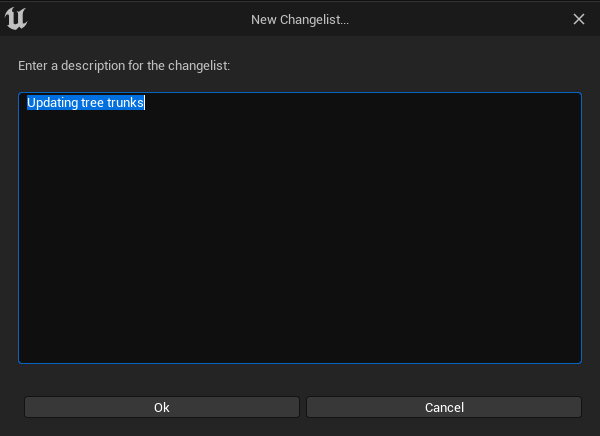
![]()
A New Changelist window will appear, prompting you to enter a description. Click ‘OK’ when done.
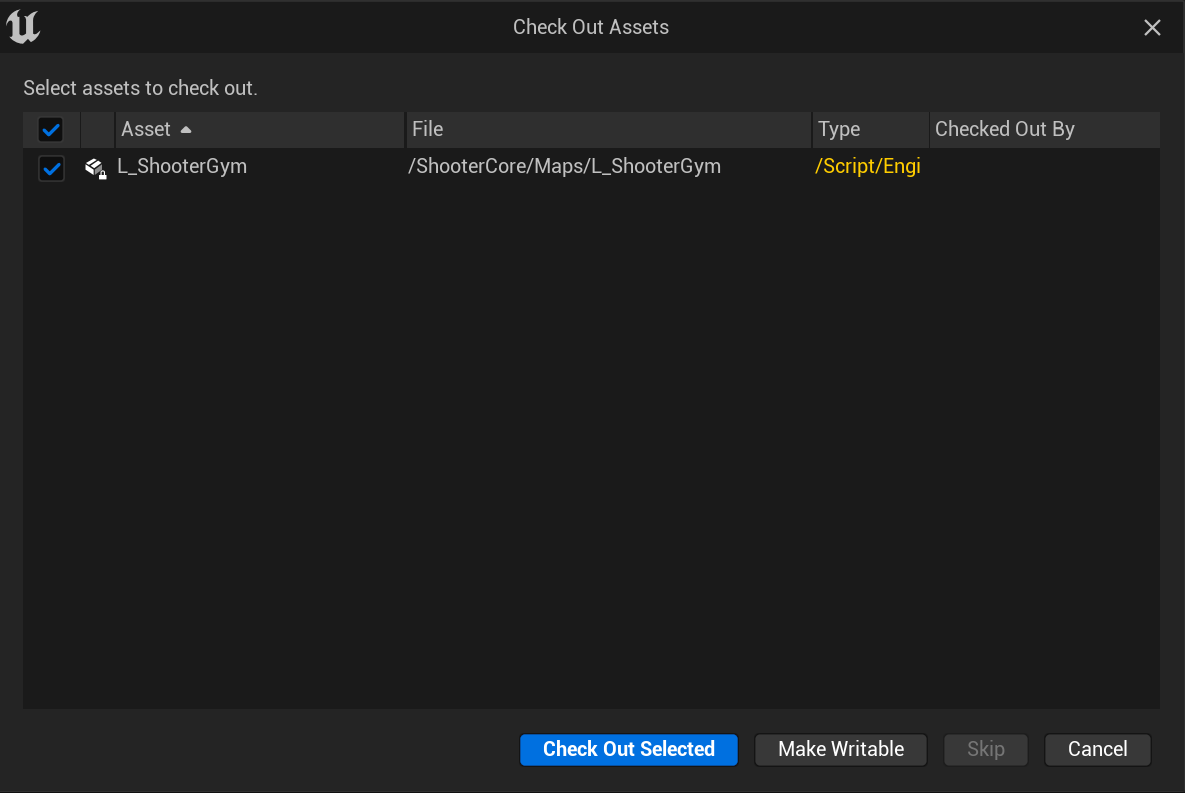
Check out
In the Unreal Editor, checked out files can be added to a changelist and submitted. To check out a file, choose one of the following methods.
Check out a file that you plan to change
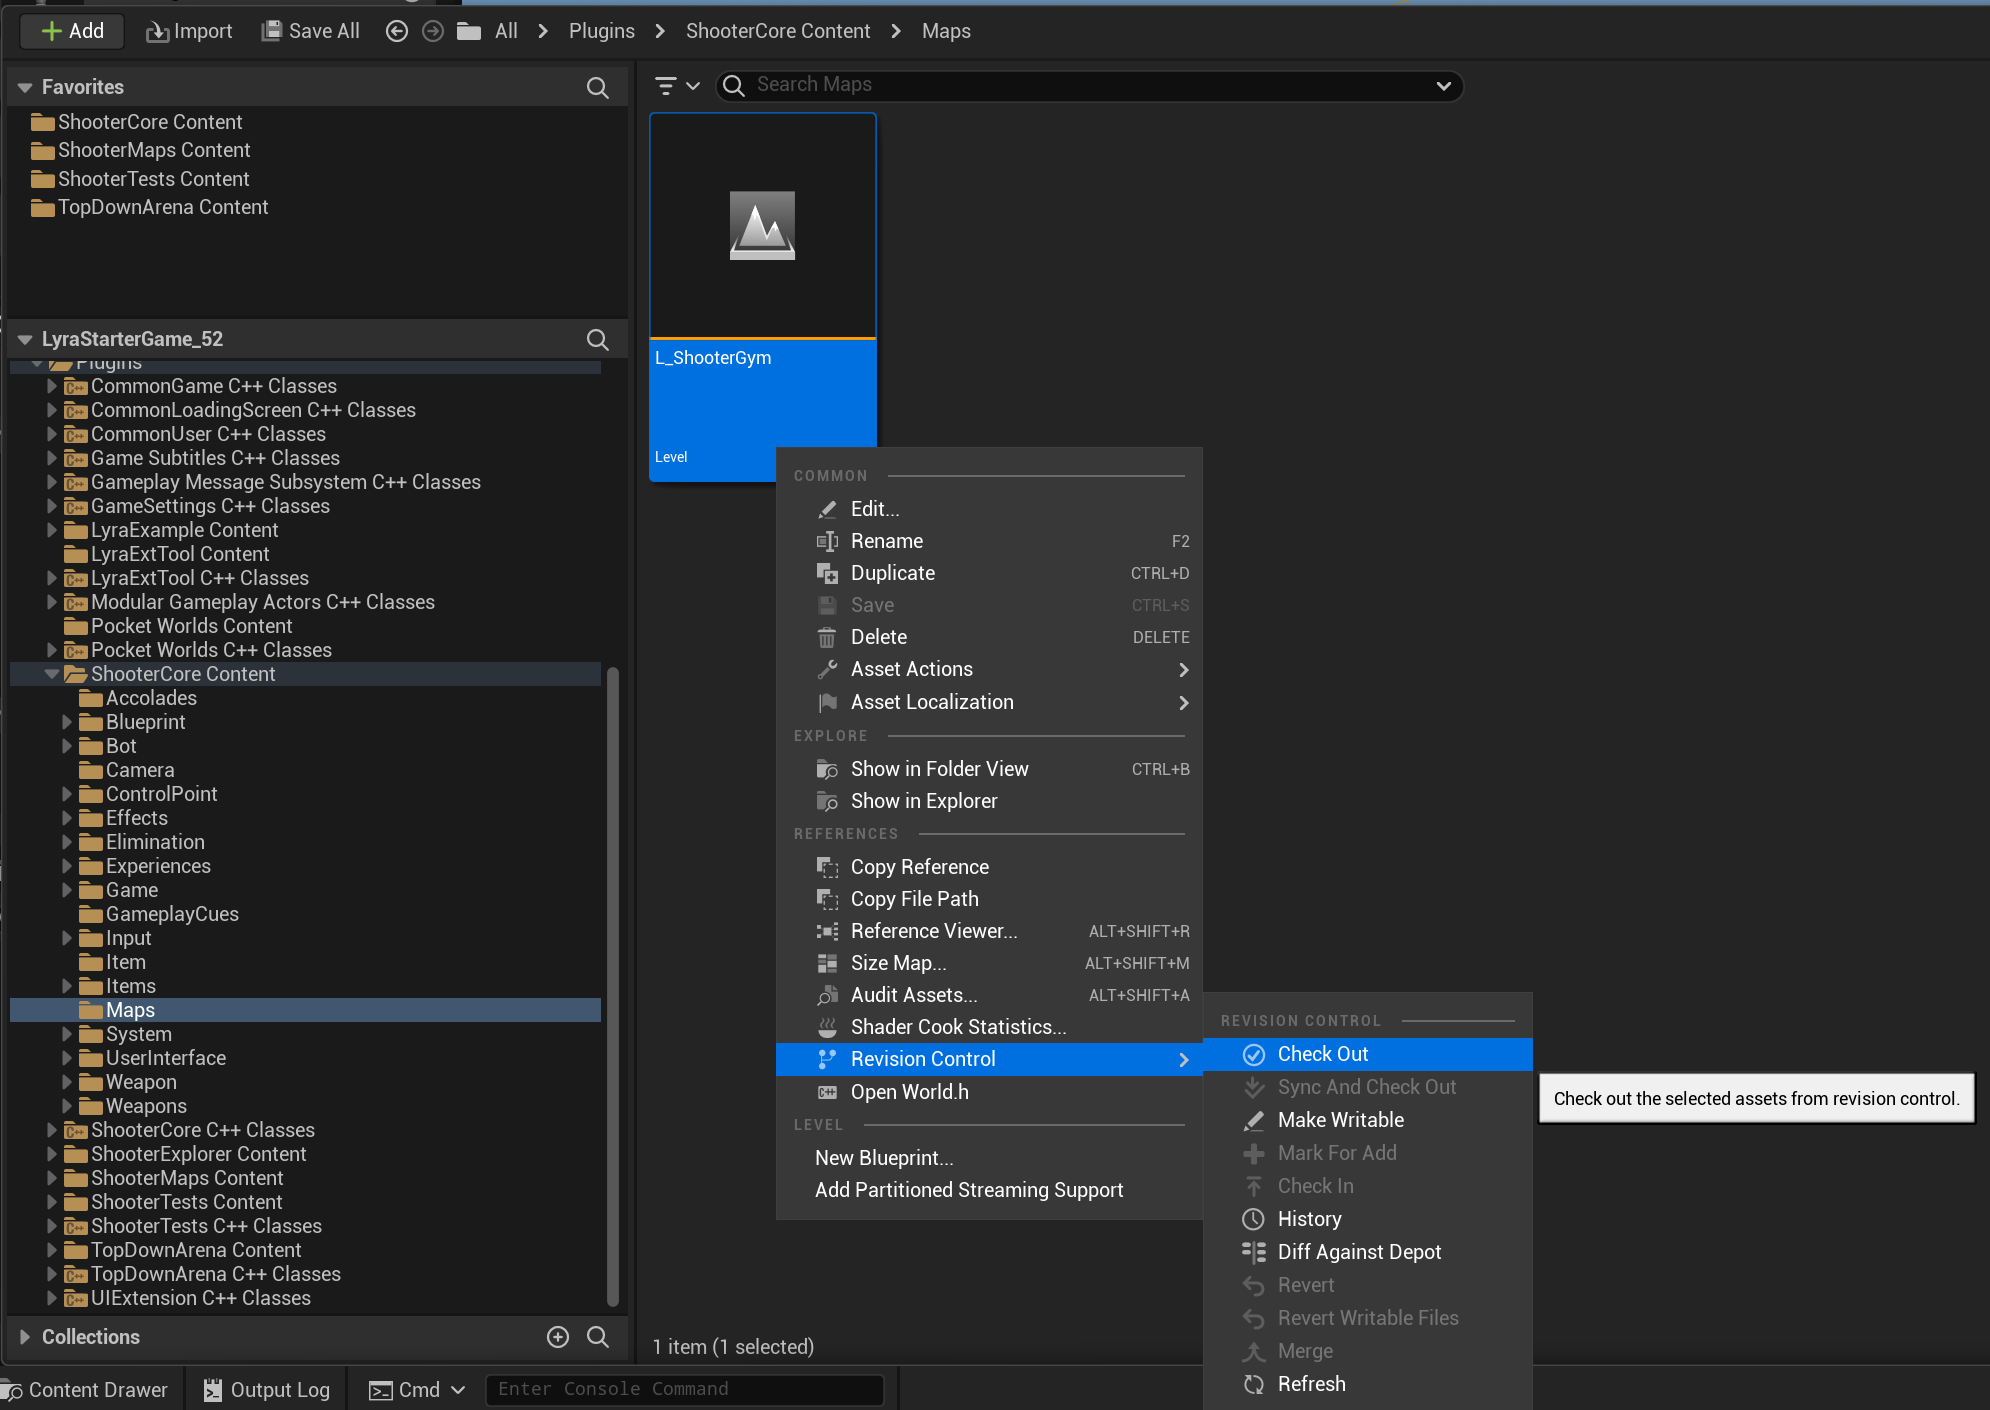
In Unreal Editor, locate your file in the content browser, right-click on the file, and click Source control > Check out, or if you’re using 5.2+, click on Revision control > Check out.
Check out after edit.
- In the Unreal Editor, go to the Content Browser, select the file you want to work on, edit the file, and save. You will be prompted to select the file you want to check out. Select Check out and continue.
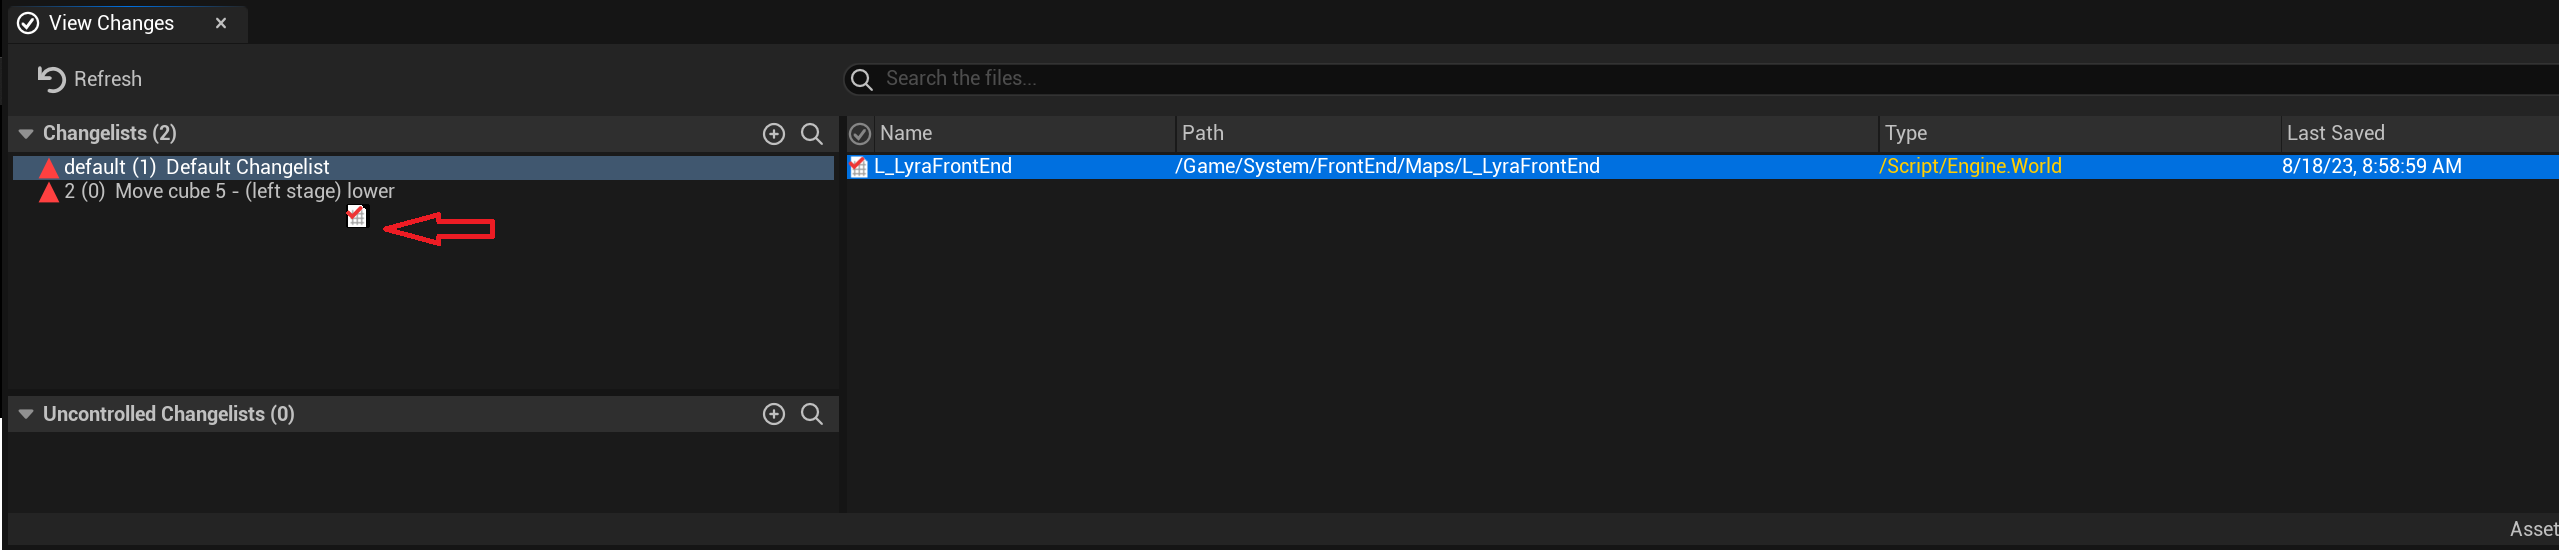
Move changes between Changelists
With the ability to create multiple changelists, users now have two ways to move files around to different changelists to commit their changes later.
Move files to…
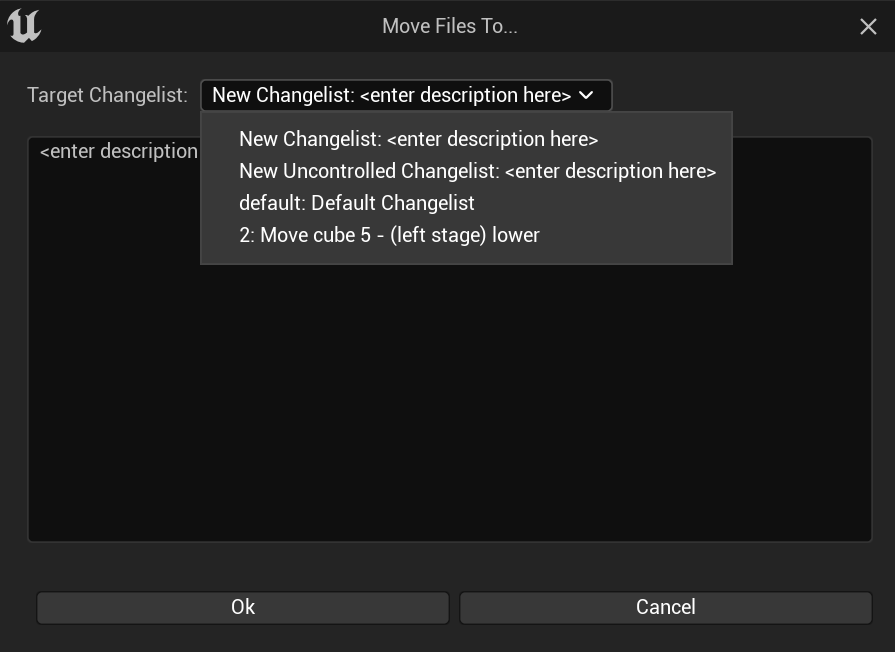
In the View Changes window, right-click on the file you want to move. Select the Move files to… option. Select the target changelist dropdown and select from the available options.
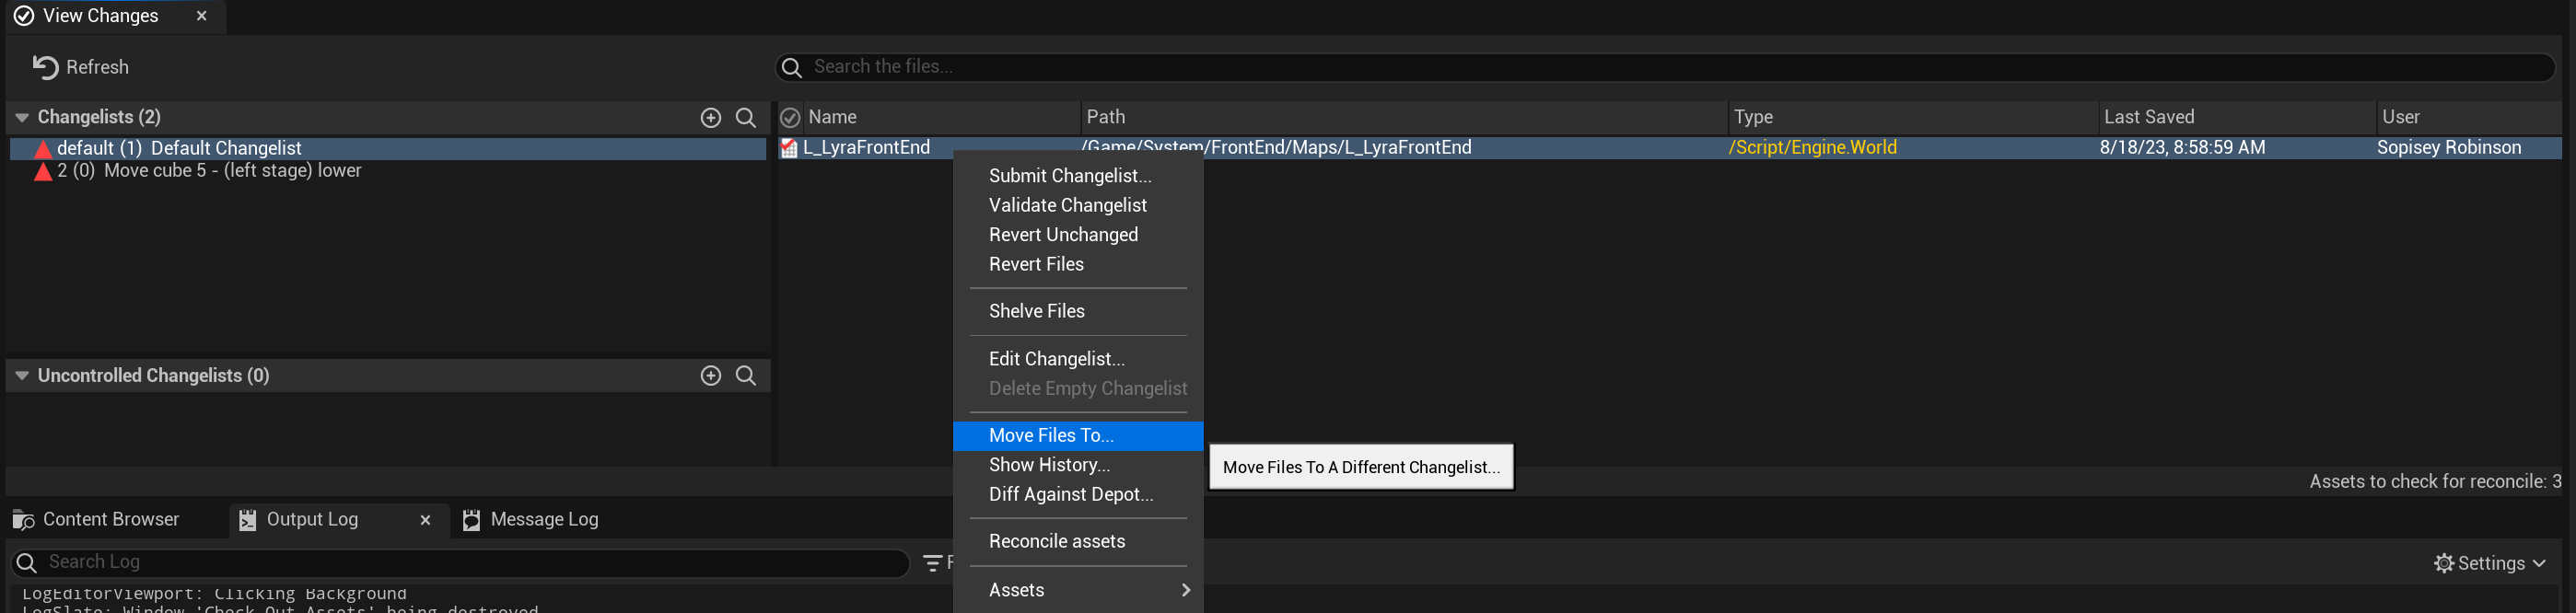
The dropdown will allow you to create a new changelist to move your file to if you don’t already have one or select an existing one. Enter all the required info to continue.
Drag and drop
In the View Changes window, locate the file you want to move out and drag it to the desired changelist. If you don’t have a changelist available to move it to, you can create one first.
Submit a changelist
To create and submit a changelist after you’re done making changes, perform the following:
- In the Unreal Editor, right-click on the changelist you would like to check out, and click Submit changelist.
- Enter a description if you haven’t already, or update it if needed.
- Optional: Under the Changelist description textbox is a list of files that you’ve changed and are automatically added to the changelist.
- Optional: If you want to keep the files in the changelist checked out after you submit the changelist, select Keep files checked out.
- Click Submit to submit your changes.
Check the changelist history of a file
To view a list of changes for a file, right-click on the file and click Source control > History. This opens the File history window, which lists all changelists involving the file. You can click on a changelist to get the details of that changelist.
Revert changes
You can revert the changes that you’ve made to a single file or revert all changes.
Revert changes to individual files
To revert the changes you’ve made to a file since the file was checked out, right-click on the file and click Source control > Revert.
Revert all changes
To revert all changes you’ve made, in the Unreal Editor, select the changelist you want to revert, select all the files you want to revert, and click Source control > Revert.
Shelve Files
The WVS plugin does not support the Shelve Files functionality, but supports creating multiple changelists, which will allow you to move different files into them. If you want to organize your changes and save them to submit later, you can create an additional changelist and drag the file you want into it or use the right-click Move Files option. See Move Changes between changelists.
Status Icons
![]()
Prefer to watch a video?
Watch our video to learn more about working with the WVS Unreal Plugin.
Don’t have the plugin yet?
Go to our Download page, grab the plugin, and try it.
Next steps
- Learn about setting up flows in your UE Project.