WVS plugin Source Control Settings in Unreal Engine
Inside the Unreal Editor, you can find source control settings you could set up to help your workflow.
Activating source control in Unreal
There are many ways to activate the source control in Unreal and we’ll guide you through the different options.
Setting up through the source control button at the bottom of the screen
-
In Unreal Engine 5.0 and above (location is different for previous versions), locate the Source Control button on the bottom right of your editor and expand it.
- From the options, select Connect to Source Control.
- In the provider list, locate WVS from the dropdown, your WVS username and email should populate.
- Click on Accept Settings
A success message is displayed once your are connected.
If you do not see WVS in the list of Providers, be sure to check your plugin is properly enabled.
- In Unreal Editor, go to Edit > Plugins
- Scroll to the bottom and locate WVS and make sure the box is checked to enable the plugin.
- If it was not checked, click the box to enable and allow the browser to restart when asked.
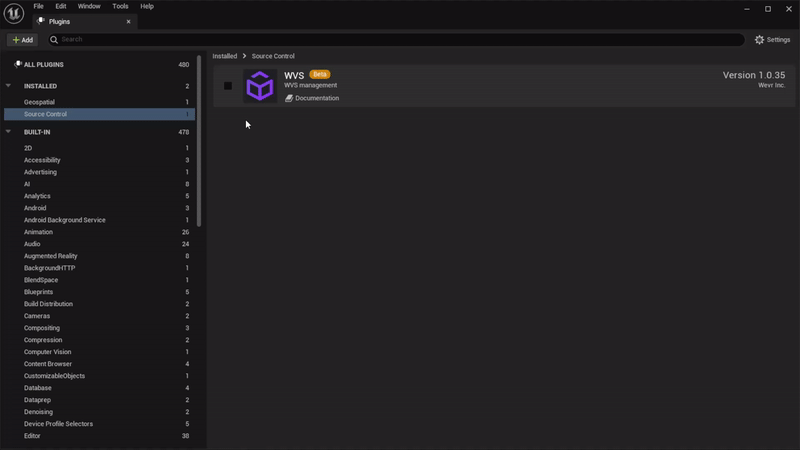
The WVS Unreal Plugin should now be available in the list of Providers.
Setting up through the Content Browser
You can set up your source control in the Content Browser in the editor.
- Click to open the Content drawer.
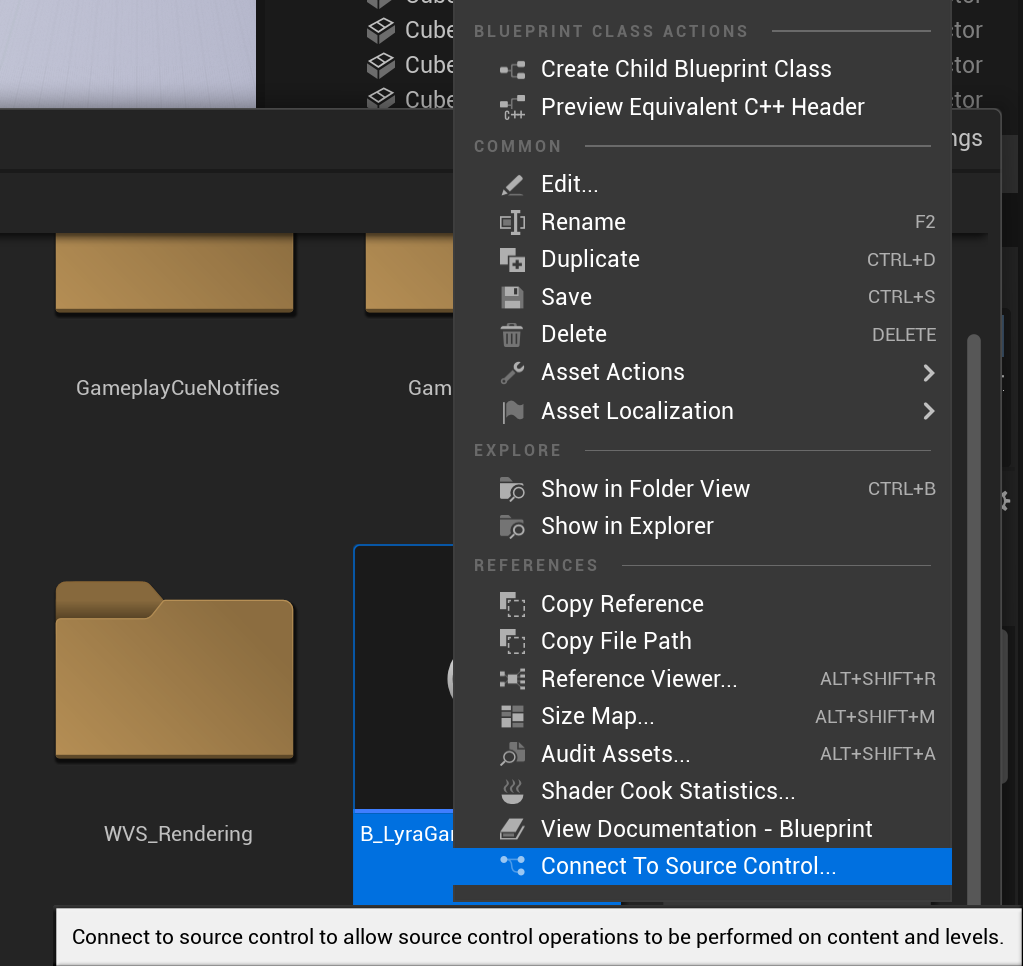
- Right-click any asset or folder.
-
At the bottom of the context menu, click Connect to Source Control.
- In the provider list, locate WVS from the dropdown, your WVS username and email should populate.
- Click on Accept Settings.
View available source control settings.
Additional Source control settings are available in the editor.
- Go to Edit > Editor Preferences….
-
From the left-hand side, click on Loading & Saving.

- At the bottom of the page, locate the Source Control section.
Listed below are the available options that can help with your workflow.
| Task | Description |
|---|---|
| Automatically Checkout on Asset Modification | When selected, this will automatically check out any asset that you’ve modified. |
| Prompt for Checkout on Package Modification | When selected, a prompt will appear when you make changes to a source controlled-package, asking if you would like to check out (lock) that package. |
| Add New Files when Modified | When seelcted, this adds modified files into source control. |
| Use Global Settings | When selected, rather than using per-project settings, a global source control login settings is used. Changing this will require you to login again. |
| Tool for diffing text | Specifies the file path to the tool to be used for diffing text files. |
Don’t have the plugin yet?
Go to our download page and grab the plugin and give it a try.