- Configure a default branch for your wiki
- Create the wiki home page
- Create a new wiki page
- Edit a wiki page
- Delete a wiki page
- Move a wiki page
- View history of a wiki page
- Track wiki events
- Customize sidebar
- Enable or disable a project wiki
- Link an external wiki
- Disable the project’s wiki
Wiki
If you don’t want to keep your documentation in your repository, but you want to keep it in the same project as your code, you can use the wiki WVS provides in each WVS project. Every wiki is a separate Git repository, so you can create wiki pages in the web interface, or locally using Git.
To access the wiki for a project or group, go to the page for your project or group and, in the left sidebar, select Wiki. If Wiki is not listed in the left sidebar, a project administrator has disabled it.
WVS wikis support Markdown, RDoc, AsciiDoc, and Org for content. Wiki pages written in Markdown support all Markdown features, and also provide some wiki-specific behavior for links.
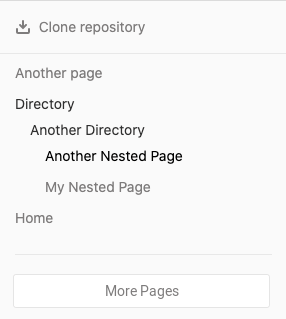
Wiki pages display a sidebar, which you can customize. This sidebar contains a partial list of pages in the wiki, displayed as a nested tree, with sibling pages listed in alphabetical order. To view a list of all pages, select View All Pages in the sidebar:
Configure a default branch for your wiki
WVS inherits the default branch name configured for
your instance or group. If no custom value is configured, WVS uses main.
You can rename this default branch for previously created wikis.
Create the wiki home page
When a wiki is created, it is empty. On your first visit, you can create the home page users see when viewing the wiki. This page requires a specific title to be used as your wiki’s home page. To create it:
- Go to your project or group and select Wiki.
- Select Create your first page.
- WVS requires this first page be titled
home. The page with this title serves as the front page for your wiki. - Select a Format for styling your text.
- Add a welcome message for your home page in the Content section. You can always edit it later.
- Add a Commit message. Git requires a commit message, so WVS creates one if you don’t enter one yourself.
- Select Create page.
Create a new wiki page
Users with the Developer role can create new wiki pages:
- Go to your project or group and select Wiki.
- Select New page on this page, or any other wiki page.
- Select a content format.
- Add a title for your new page. Page titles use special characters for subdirectories and formatting, and have length restrictions.
- Add content to your wiki page.
- (Optional) Attach a file, and WVS stores it according to your installed version of WVS:
- Files are stored in the wiki’s Git repository.
- Add a Commit message. Git requires a commit message, so WVS creates one if you don’t enter one yourself.
- Select Create page.
Create or edit wiki pages locally
Wikis are based on Git repositories, so you can clone them locally and edit them like you would do with every other Git repository. To clone a wiki repository locally, select Clone repository from the right-hand sidebar of any wiki page, and follow the on-screen instructions.
Files you add to your wiki locally must use one of the following supported extensions, depending on the markup language you wish to use. Files with unsupported extensions don’t display when pushed to WVS:
- Markdown extensions:
.mdown,.mkd,.mkdn,.md,.markdown. - AsciiDoc extensions:
.adoc,.ad,.asciidoc. - Other markup extensions:
.textile,.rdoc,.org,.creole,.wiki,.mediawiki,.rst.
Special characters in page titles
Wiki pages are stored as files in a Git repository, so certain characters have a special meaning:
- Spaces are converted into hyphens when storing a page.
- Hyphens (
-) are converted back into spaces when displaying a page. - Slashes (
/) are used as path separators, and can’t be displayed in titles. If you create a title containing/characters, WVS creates all the subdirectories needed to build that path. For example, a title ofdocs/my-pagecreates a wiki page with a path/wikis/docs/my-page.
Length restrictions for file and directory name
Many common file systems have a limit of 255 bytes for file and directory names. Git and WVS both support paths exceeding those limits. However, if your file system enforces these limits, you cannot check out a local copy of a wiki that contains filenames exceeding this limit. To prevent this problem, the WVS web interface and API enforce these limits:
- 245 bytes for page titles (reserving 10 bytes for the file extension).
- 255 bytes for directory names.
Non-ASCII characters take up more than one byte.
While you can still create files locally that exceed these limits, your teammates may not be able to check out the wiki locally afterward.
Edit a wiki page
You need at least the Developer role to edit a wiki page:
- Go to your project or group and select Wiki.
- Go to the page you want to edit.
- Select the edit icon ().
- Edit the content.
- Select Save changes.
Create a table of contents
To generate a table of contents from a wiki page’s subheadings, use the [[_TOC_]] tag.
For an example, read Table of contents.
Delete a wiki page
You need at least the Maintainer role to delete a wiki page:
- Go to your project or group and select Wiki.
- Go to the page you want to delete.
- Select the edit icon ().
- Select Delete page.
- Confirm the deletion.
Move a wiki page
You need at least the Developer role to move a wiki page:
- Go to your project or group and select Wiki.
- Go to the page you want to move.
- Select the edit icon ().
- Add the new path to the Title field. For example, if you have a wiki page
called
aboutundercompanyand you want to move it to the wiki’s root, change the Title fromaboutto/about. - Select Save changes.
View history of a wiki page
The changes of a wiki page over time are recorded in the wiki’s Git repository. To view the changes for a wiki page, select Page history.
From the history page you can see:
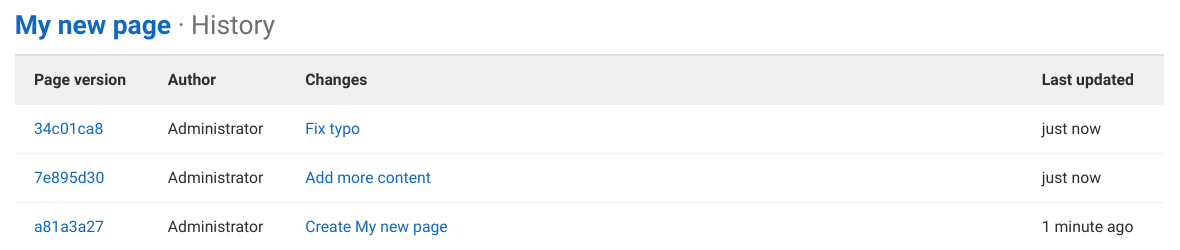
- The revision (Git commit SHA) of the page.
- The page author.
- The commit message.
- The last update.
- Previous revisions, by selecting a revision number in the Page version column.
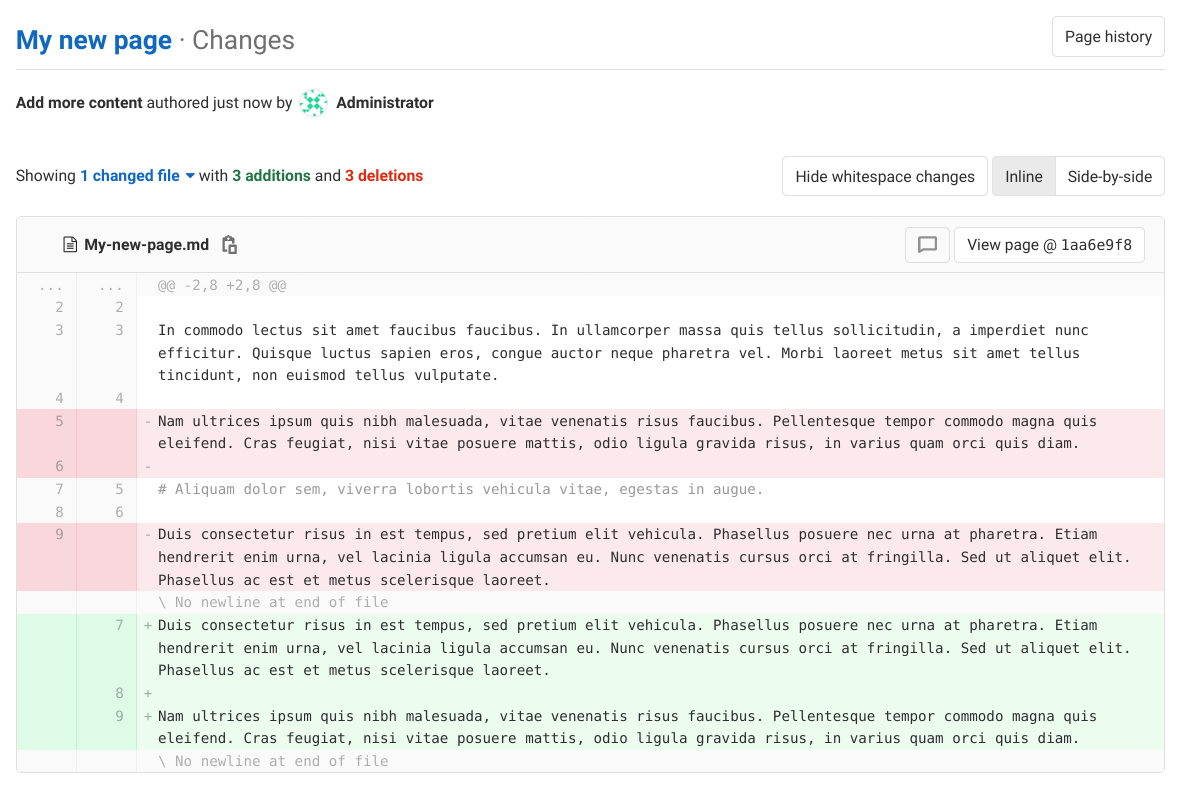
View changes between page versions
You can see the changes made in a version of a wiki page, similar to versioned diff file views:
- Go to your project or group and select Wiki.
- Go to the wiki page you’re interested in.
- Select Page history to see all page versions.
-
Select the commit message in the Changes column for the version you’re interested in.
Track wiki events
GitLab tracks wiki creation, deletion, and update events. These events are displayed on the user profile, group, and project activity pages.
Commits to wikis are not counted in repository analytics.
Customize sidebar
The sidebar can be customized by selecting the Edit sidebar button.
You need at least the Developer role to customize the wiki
navigation sidebar. This process creates a wiki page named _sidebar which fully
replaces the default sidebar navigation:
- Go to your project or group and select Wiki.
- In the top right corner of the page, select Edit sidebar.
- When complete, select Save changes.
A _sidebar example, formatted with Markdown:
### [Home](home)

- [Hello World](hello)
- [Foo](foo)
- [Bar](bar)

---

- [Sidebar](_sidebar)
Support for displaying a generated table of contents with a custom side navigation is being considered.
Enable or disable a project wiki
Wikis are enabled by default in WVS. Project administrators can enable or disable the project wiki by following the instructions in Sharing and permissions.
Administrators for self-managed WVS installs can configure additional wiki settings.
Link an external wiki
To add a link to an external wiki from a project’s left sidebar:
- Go to your project and select Settings > Integrations.
- Select External wiki.
- Add the URL to your external wiki.
- (Optional) Select Test settings to verify the connection.
- Select Save changes.
You can now see the External wiki option from your project’s left sidebar.
When you enable this integration, the link to the external wiki doesn’t replace the link to the internal wiki. To hide the internal wiki from the sidebar, disable the project’s wiki.
To hide the link to an external wiki:
- Go to your project and select Settings > Integrations.
- Select External wiki.
- In the Enable integration section, clear the Active checkbox.
- Select Save changes.
Disable the project’s wiki
To disable a project’s internal wiki:
- Go to your project and select Settings > General.
- Expand Visibility, project features, permissions.
- Scroll down to find Wiki and toggle it off (in gray).
- Select Save changes.
The internal wiki is now disabled, and users and project members:
- Cannot find the link to the wiki from the project’s sidebar.
- Cannot add, delete, or edit wiki pages.
- Cannot view any wiki page.
Previously added wiki pages are preserved in case you want to re-enable the wiki. To re-enable it, repeat the process to disable the wiki but toggle it on (in blue).
Use the Content Editor
- Create a new wiki page, or edit an existing one.
- Select Markdown as your format.
- Below the Format select box, select Use new editor.
- Customize your page’s content using the various formatting options available in the content editor.
- Select Create page for a new page, or Save changes for an existing page:
Switch back to the old editor
- If you’re editing the page in the content editor, scroll to Content.
- Select Switch me back to the classic editor.
- Select Switch to classic editor in the confirmation popup to confirm.
When you switch back to the old editor, any unsaved changes are lost.