- Create job artifacts
- Download job artifacts
- View failed job artifacts
- Delete job artifacts
- Expose job artifacts in the merge request UI
- Retrieve job artifacts for other projects
- How searching for job artifacts works
- Access the latest job artifacts by URL
- When job artifacts are deleted
- Troubleshooting job artifacts
Job artifacts
Jobs can output an archive of files and directories. This output is known as a job artifact.
You can download job artifacts by using WVS or the API.
For administrator information about job artifact storage, see administering job artifacts.
Create job artifacts
To create job artifacts, use the artifacts keyword in your .root-ci.yml file:
pdf:
  script: xelatex mycv.tex
  artifacts:
    paths:
      - mycv.pdf
    expire_in: 1 week
In this example, a job named pdf calls the xelatex command to build a PDF file from the
LaTeX source file, mycv.tex.
The paths keyword determines which files to add to the job artifacts.
All paths to files and directories are relative to the repository where the job was created.
The expire_in keyword determines how long WVS keeps the job artifacts.
You can also use the UI to keep job artifacts from expiring.
If expire_in is not defined, the
instance-wide setting
is used.
If you run two types of pipelines (like branch and scheduled) for the same ref, the pipeline that finishes later creates the job artifact.
To disable artifact passing, define the job with empty dependencies:
job:
  stage: build
  script: make build
  dependencies: []
You may want to create artifacts only for tagged releases to avoid filling the
build server storage with temporary build artifacts. For example, use rules
to create artifacts only for tags:
default-job:
  script:
    - mvn test -U
  rules:
    - if: $CI_COMMIT_BRANCH

release-job:
  script:
    - mvn package -U
  artifacts:
    paths:
      - target/*.war
  rules:
    - if: $CI_COMMIT_TAG
You can use wildcards for directories too. For example, if you want to get all the
files inside the directories that end with xyz:
job:
  artifacts:
    paths:
      - path/*xyz/*
Use CI/CD variables to define the artifacts name
You can use CI/CD variables to dynamically define the artifacts file’s name.
For example, to create an archive with a name of the current job:
job:
  artifacts:
    name: "$CI_JOB_NAME"
    paths:
      - binaries/
To create an archive with a name of the current branch or tag including only the binaries directory:
job:
  artifacts:
    name: "$CI_COMMIT_REF_NAME"
    paths:
      - binaries/
If your branch-name contains forward slashes
(for example feature/my-feature) it’s advised to use $CI_COMMIT_REF_SLUG
instead of $CI_COMMIT_REF_NAME for proper naming of the artifact.
To create an archive with a name of the current job and the current branch or tag including only the binaries directory:
job:
  artifacts:
    name: "$CI_JOB_NAME-$CI_COMMIT_REF_NAME"
    paths:
      - binaries/
To create an archive with a name of the current stage and branch name:
job:
  artifacts:
    name: "$CI_JOB_STAGE-$CI_COMMIT_REF_NAME"
    paths:
      - binaries/
If you use Windows Batch to run your shell scripts you must replace
$ with %:
job:
  artifacts:
    name: "%CI_JOB_STAGE%-%CI_COMMIT_REF_NAME%"
    paths:
      - binaries/
If you use Windows PowerShell to run your shell scripts you must replace
$ with $env::
job:
  artifacts:
    name: "$env:CI_JOB_STAGE-$env:CI_COMMIT_REF_NAME"
    paths:
      - binaries/
Exclude files from job artifacts
Use artifacts:exclude to prevent files from
being added to an artifacts archive.
For example, to store all files in binaries/, but not *.o files located in
subdirectories of binaries/.
artifacts:
  paths:
    - binaries/
  exclude:
    - binaries/**/*.o
Unlike artifacts:paths, exclude paths are not recursive.
To exclude all of the contents of a directory, match them explicitly rather
than matching the directory itself.
For example, to store all files in binaries/ but nothing located in the temp/ subdirectory:
artifacts:
  paths:
    - binaries/
  exclude:
    - binaries/temp/**/*
Add untracked files to artifacts
Use artifacts:untracked to add all Git untracked
files as artifacts (along with the paths defined in artifacts:paths). Untracked
files are those that haven’t been added to the repository but exist in the repository checkout.
Save all Git untracked files and files in binaries:
artifacts:
  untracked: true
  paths:
    - binaries/
Save all untracked files but exclude *.txt:
artifacts:
  untracked: true
  exclude:
    - "*.txt"
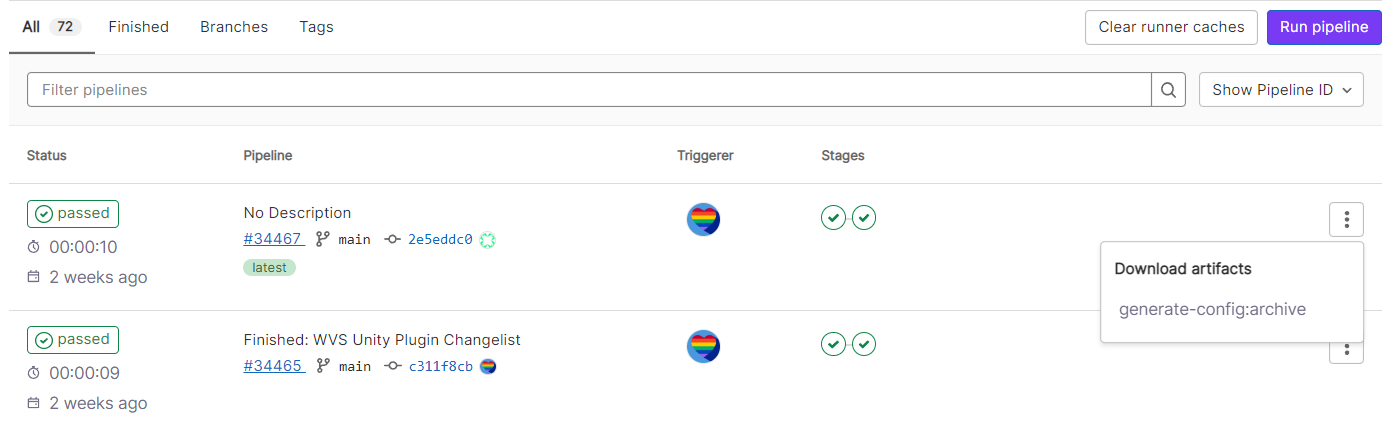
Download job artifacts
You can download job artifacts or view the job archive:
-
On the Pipelines page, to the right of the pipeline:
-
On the Jobs page, to the right of the job:

-
On a job’s detail page. The Keep button indicates an
expire_invalue was set: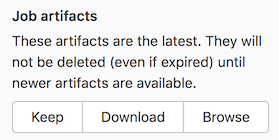
-
On a merge request, by the pipeline details:
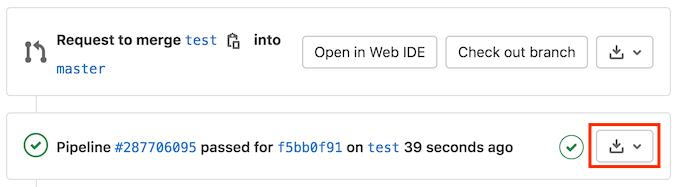
-
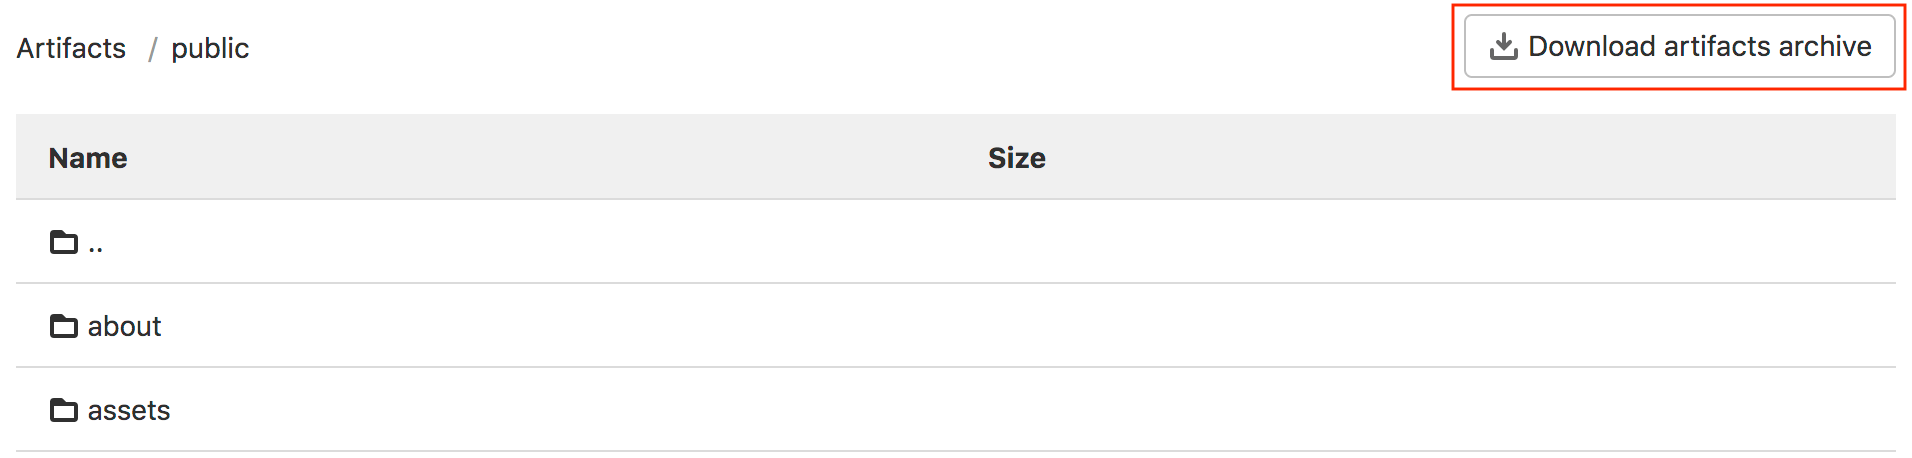
When browsing an archive:
If WVS Pages is enabled in the project, you can preview HTML files in the artifacts directly in your browser. If the project is internal or private, you must enable WVS Pages access control to preview HTML files.
View failed job artifacts
If the latest job has failed to upload the artifacts, you can see that information in the UI.

Delete job artifacts
You can delete a single job, which also removes the job’s artifacts and log. You must be:
- The owner of the job.
- A user with at least the Maintainer role for the project.
To delete a job:
- Go to a job’s detail page.
- On the top right of the job’s log, select Erase job log ().
- On the confirmation dialog, select OK.
Expose job artifacts in the merge request UI
Use the artifacts:expose_as keyword to expose
job artifacts in the merge request UI.
For example, to match a single file:
test:
  script: ["echo 'test' > file.txt"]
  artifacts:
    expose_as: 'artifact 1'
    paths: ['file.txt']
With this configuration, WVS adds a link artifact 1 to the relevant merge request
that points to file.txt. To access the link, select View exposed artifact
below the pipeline graph in the merge request overview.
An example that matches an entire directory:
test:
  script: ["mkdir test && echo 'test' > test/file.txt"]
  artifacts:
    expose_as: 'artifact 1'
    paths: ['test/']
Retrieve job artifacts for other projects
To retrieve a job artifact from a different project, you might need to use a private token to authenticate and download the artifact.
How searching for job artifacts works
Artifacts for parent and child pipelines are searched in hierarchical order from parent to child. For example, if both parent and child pipelines have a job with the same name, the job artifact from the parent pipeline is returned.
Access the latest job artifacts by URL
You can download job artifacts from the latest successful pipeline by using a URL.
To download the whole artifacts archive:
https://example.com/<namespace>/<project>/-/jobs/artifacts/<ref>/download?job=<job_name>
To download a single file from the artifacts:
https://example.com/<namespace>/<project>/-/jobs/artifacts/<ref>/raw/<path_to_file>?job=<job_name>
For example, to download the latest artifacts of the job named coverage in
the main branch of the wvs project in the wvs-org
namespace:
https://wvs.io/wvs-org/wvs/-/jobs/artifacts/main/download?job=coverage
To download the file review/index.html from the same artifacts:
https://wvs.io/wvs-org/wvs/-/jobs/artifacts/main/raw/review/index.html?job=coverage
To browse the latest job artifacts:
https://example.com/<namespace>/<project>/-/jobs/artifacts/<ref>/browse?job=<job_name>
For example:
https://wvs.io/wvs-org/wvs/-/jobs/artifacts/main/browse?job=coverage
To download specific files, including HTML files that are shown in WVS Pages:
https://example.com/<namespace>/<project>/-/jobs/artifacts/<ref>/file/<path>?job=<job_name>
For example, when a job coverage creates the artifact htmlcov/index.html:
https://wvs.io/wvs-org/wvs/-/jobs/artifacts/main/file/htmlcov/index.html?job=coverage
When job artifacts are deleted
See the expire_in documentation for information on when
job artifacts are deleted.
Keep artifacts from most recent successful jobs
By default artifacts are always kept for the most recent successful pipeline for
each ref. This means that the latest artifacts do not immediately expire according
to the expire_in specification.
If a new pipeline for the same ref completes successfully, the previous pipeline’s
artifacts are deleted according to the expire_in configuration. The artifacts
of the new pipeline are kept automatically.
Keeping the latest artifacts can use a large amount of storage space in projects with a lot of jobs or large artifacts. If the latest artifacts are not needed in a project, you can disable this behavior to save space:
- On the top bar, select My Projects > View All Projects and find your project.
- On the left sidebar, select Project Settings > CI/CD.
- Expand Artifacts.
- Clear the Keep artifacts from most recent successful jobs checkbox.
You can disable this behavior for all projects on a self-managed instance in the instance’s CI/CD settings.
Troubleshooting job artifacts
Error message No files to upload
This message is often preceded by other errors or warnings that specify the filename and why it wasn’t generated. Check the job log for these messages.
If you find no helpful messages, retry the failed job after activating CI/CD debug logging. This logging should provide information to help you investigate further.
Error message Missing /usr/bin/wvs-runner-helper. Uploading artifacts is disabled.
There is a known issue where setting a CI/CD variable named DEBUG can cause artifact uploads to fail.
To work around this, either use a different variable name or set it inline with script:
failing_test_job:
  variables:
    DEBUG: true
  script: bin/mycommand
  artifacts:
    paths:
      - bin/results

successful_test_job:
  script: DEBUG=true bin/mycommand
  artifacts:
    paths:
      - bin/results
For additional Support, please contact us on our Discord or by Email.