Plastic SCM Bridge
What is the Plastic SCM Bridge?
If you have a repository in Plastic, this bridge will help simplify the communication between your repository in Plastic and WVS. Through automation, the Plastic SCM bridge uses a Flow in WVS to sync a Plastic repository to your WVS repository in real time so you can continue using Plastic and still take advantage of the automation features of WVS.
Setup
Prerequisite
- Plastic SCM Account
- Plastic SCM Repo
Required Variables
| Variables | Description |
|---|---|
| WVS_PLASTIC_REPO | Repository made in Plastic SCM |
| WVS_PLASTIC_SERVER | Server Address for Plastic SCM |
| WVS_GIT_PRIVATE_KEY | Deployment Key created on WVS |
| WVS_GIT_PERSONAL_ACCESS_TOKEN | Personal Access Token created on WVS |
| WVS_NAMESPACE | WVS Project Namespace |
| WVS_PROJECT_NAME | WVS Project Name |
| WVS_PLASTIC_USER | Plastic SCM Username |
| WVS_PLASTIC_PASS | Plastic SCM Password |
| WVS_GIT_USER | WVS login email |
Create a Repo
First, we will create a New Project/repository on WVS. This repository will be your control repository that syncs changes between your Plastic repository and WVS.
While in Projects, you can click on the New project button at the top of the page to create a new project.
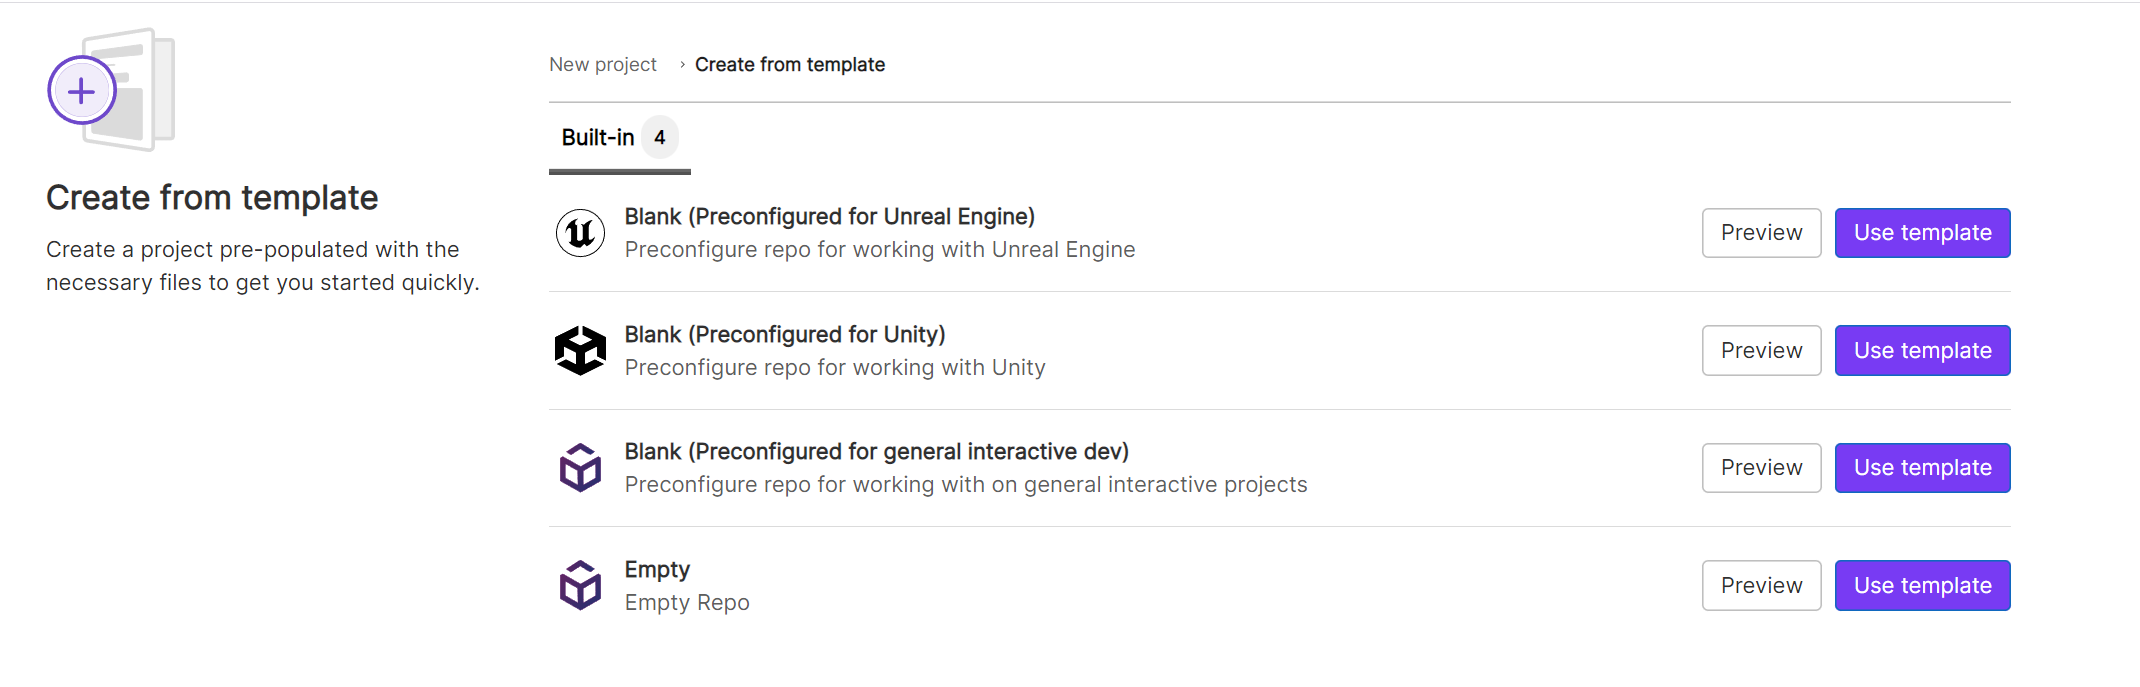
An Empty template can be selected from the list of templates available.
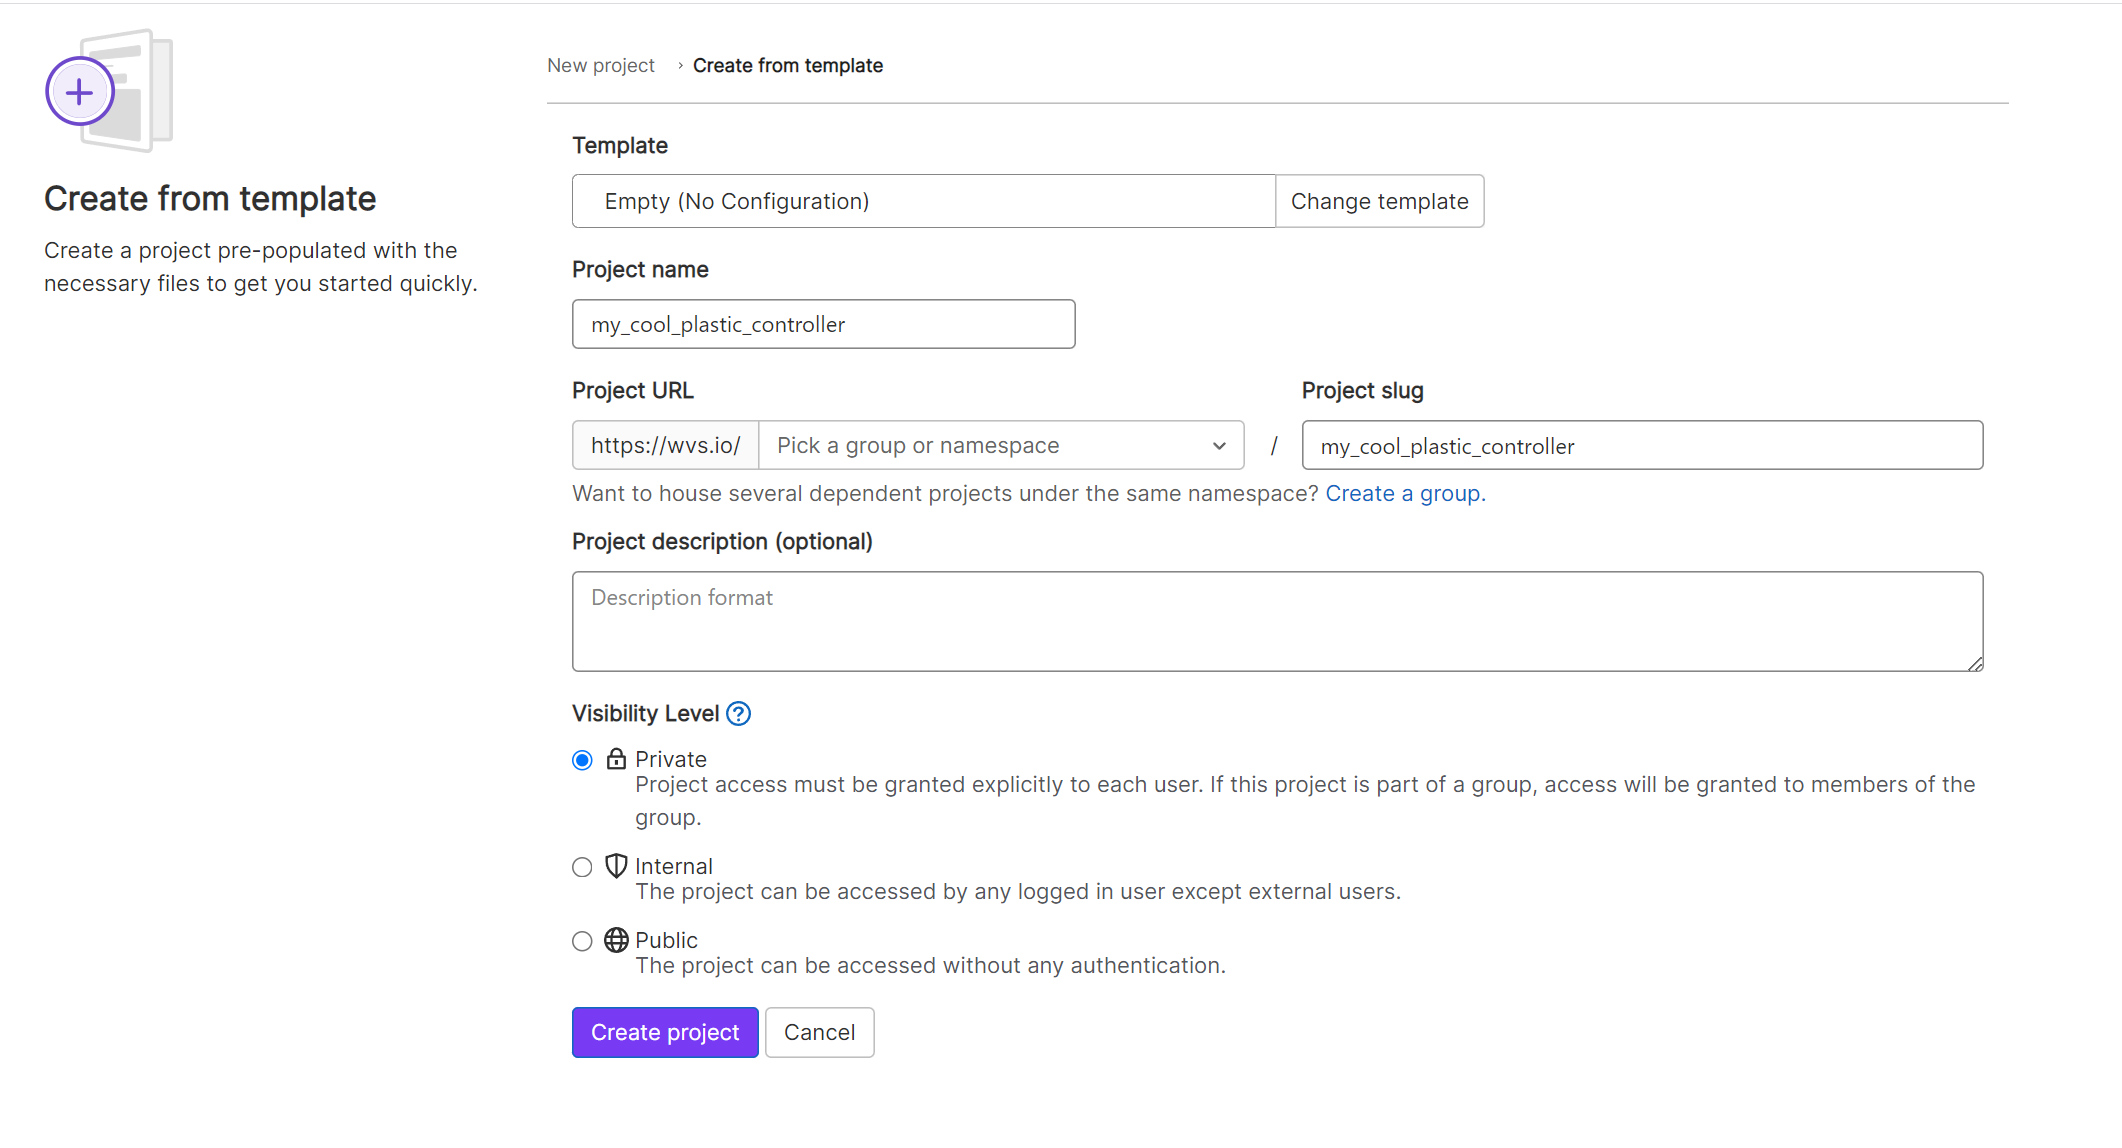
- Create a Project name.
- Select your desired Group or Namespace from the drop-down.
- The project slug gets generated automatically after you create the Project name.
- Include an optional Project description to help you remember what this project or repo is.
- Select your Visibility Level
- Click on Create project
Choose a Version Control Client
WVS uses Git, and if you’re familiar with Git, we suggest you use your favorite Git client, such as GitHub or Sourcetree, which works great with WVS. We are developing a very easy-to-use Git client for artists and less technical users. We suggest you try it out.
- Download the WVS Clients for Windows: https://docs.wvs.io/wiki/downloads.
- Run the downloaded installer
- Launch the Windows command prompt and run
wvs authenticate. - A web browser will open up, and a login screen will appear.
- Log in with your WVS account if you aren’t already.
- Once complete, you may close that tab and return the WVS CLI.
📖 Learn to use the WVS Client by checking out this Tutorial.
Set up your project in the WVS CLI
Before we use the client to work in your Plastic Repo Controller, let’s clone the project to your local.
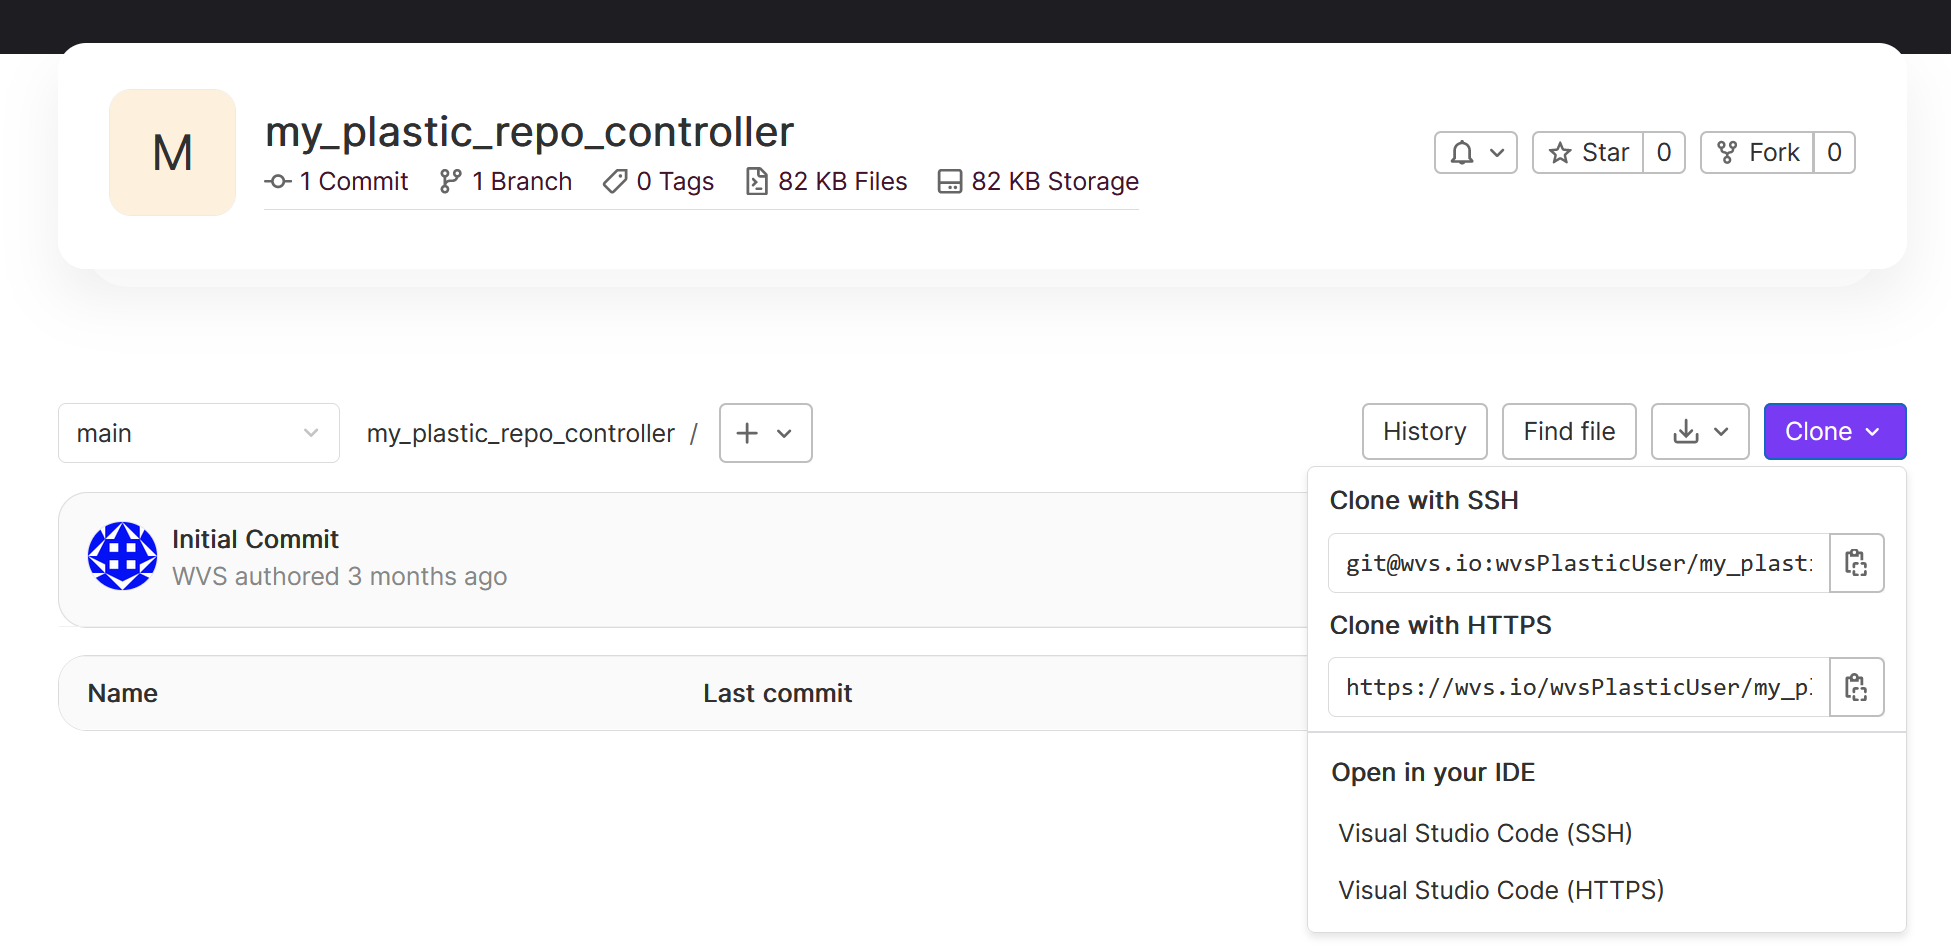
- Grab the ssh Url to clone by clicking on the Clone button in the middle of the Project Home page and copy the Clone with SSH.
- In the CLI, enter
wvs project clone --sshUrl <CloneURL>(use the URL that was copied from step 1 and enter it aftersssUrl. - Once your project is cloned, CD into the project’s root directory.
- Since we want to make some changes to the project, let’s start a changelist by running
wvs changelist begin --name "<Add Your Changelist Note here>" - Run
wvs flow setup— Since we will be running a Plastic Bridge flow in this repo, this command will set up your repo directory to work with WVS flows correctly. - Run
wvs flow registry— A list of flows will populate. Locatebridge_plasticscmfrom the list and copy it. - Run
wvs flow add bridge_plasticscm --name "<yourPlasticBridgeName"- Example:
wvs flow add bridge_plasticscm --name "plasticBridge"
- Example:
- Run
wvs flow set manualOnly <yourPlasticBridgeName> true- Example:
wvs flow set manualOnly plasticBridge true
- Example:
- Run
wvs flow set manualTrigger <yourPlasticBridgeName> "<yourTriggerString>"- Example:
wvs flow set manualTrigger plasticBridge "-execute"
- Example:
- Run
wvs changelist finishto commit your changes.
Not using WVS clients?
If you’re not using a WVS client to set this up, here are some key steps to set up your project.
- Create a folder and label it
.wvs -
Inside the
.wvsfolder, create a file and label itroot-ci.yml. Copy the content from the following and paste it into your newly created file.# Do not edit or replace. Modify the root flow in the repo instead include: remote: 'https://wvs.io/wvs-flows/root-flows/raw/main/root_flow_default.yml' - Inside of the
.wvsfolder, create a folder and label itflows -
Navigate to the
flowsdirectory that was just created and create a new file calledbridge_plasticscm.json. Copy the content from the following and paste it into your newly created file.{ "version": 5, "name": "Bridge PlasticSCM", "category": "bridge", "requireEngine": false, "jobName": ".bridge-plasticscm", "inputs": [ { "inputName": "WVS_PLASTIC_REPO", "inputType": "variable", "required": true, "default": "$WVSUSR_PLASTIC_REPO" }, { "inputName": "WVS_PLASTIC_SERVER", "inputType": "variable", "required": true, "default": "$WVSUSR_PLASTIC_SERVER" }, { "inputName": "WVS_GIT_PRIVATE_KEY", "inputType": "variable", "required": true, "default": "$WVSUSR_GIT_PRIVATE_KEY" }, { "inputName": "WVS_GIT_PERSONAL_ACCESS_TOKEN", "inputType": "variable", "required": true, "default": "$WVSUSR_GIT_PERSONAL_ACCESS_TOKEN" }, { "inputName": "WVS_NAMESPACE", "inputType": "variable", "required": true, "default": "$WVSUSR_NAMESPACE" }, { "inputName": "WVS_PROJECT_NAME", "inputType": "variable", "required": true, "default": "$WVSUSR_PROJECT_NAME" }, { "inputName": "WVS_PLASTIC_USER", "inputType": "variable", "required": true, "default": "$WVSUSR_PLASTIC_USER" }, { "inputName": "WVS_PLASTIC_PASS", "inputType": "variable", "required": true, "default": "$WVSUSR_PLASTIC_PASS" }, { "inputName": "WVS_GIT_USER", "inputType": "variable", "required": true, "default": "$WVSUSR_GIT_USER" } ] } - Commit your changes to your new project.
Setup Variables
The following list of variables is to be entered into your project. Go to your Project Settings > CI/CD. Expand the Variables section and add the variables along with the values described below.

| WVS_PLASTIC_USER |
|---|
| Plastic SCM Username |
For the variable WVS_PLASTIC_USER, enter your Plastic SCM account login name.
WVSUSR_PlASTIC_USER
| WVS_PLASTIC_PASS |
|---|
| Plastic SCM Password |
This variable requires the password for the Plastic user listed above.
WVSUSR_PlASTIC_PASS
| WVS_PLASTIC_REPO |
|---|
| Repository made in Plastic SCM |
This variable is the location of your Plastic repo.
- Example: repo@wervername@cloud
| WVS_PLASTIC_SERVER |
|---|
| Server Address for Plastic SCM |
This variable is the Plastic Server address. Here is an example of what to look for when you’re in Plastic.
- Example: servername@cloud
| WVS_NAMESPACE |
|---|
| WVS Project Namespace |
For the Variable WVS_NAMESPACE, we will be using the namespace for the project you will be syncing with your plastic repo for the value of this Variable. If you want to use a group, you can select the group name for your namespace. If you want to use your personal namespace, the value for this would be the name that is used to log in.
- Example: wvs.io/myGroupNameSpace/projectName
- Example: wvs.io/nameSpace/projectName
| WVS_PROJECT_NAME |
|---|
| WVS Project Name |
This is the name of the project you will be syncing with your plastic repository. Since the repo is not created yet, we can enter any unique project name for this variable.
- Example: My-Plastic-Repo
| WVS_GIT_USER |
|---|
| WVS login email |
This is the WVS user you would like to use to push to the WVS repository. The value for this variable is going to be your WVS login email.
WVSUSR_GIT_USER
| WVS_GIT_PRIVATE_KEY |
|---|
| Deployment key created on WVS |
We will now set up a single deploy key in your repo controller project.
If you haven’t already, you can generate a key pair with the following command on your machine.
On a PC, open up Git Bash, or if you are on a Mac, open up Terminal and run the following command:
ssh-keygen -q -t rsa -N '' -f plastic_rsa <<<y >/dev/null 2>&1
After the command successfully runs, you will need to locate the plastic_rsa.pub file in your computer’s home directory.
Copy the file’s content and use it to create a deploy key.
To create a deployment key, go back to your project in the WVS web app. In your project, go to Project Settings > Version Control > Deploy Keys
You will also need to select the checkbox to enable write access
- [x] Grant write permissions to this key
Allow this key to push to this repository
The key that gets generated will be the value that we use for WVS_GIT_PRIVATE_KEY
| WVS_GIT_PERSONAL_ACCESS_TOKEN |
|---|
| Personal Access Token created on WVS |
A personal access token will need to be generated for the Variable WVS_GIT_PERSONAL_ACCESS_TOKEN
Click your user icon on the top right of the WVS Web App.
Click Preferences.
In the left-hand nav, click on Access Tokens. Or you may navigate directly to https://wvs.io/-/profile/personal_access_tokens
Enter a unique name for your token, a name to help you remember what the token is for.
The following access permissions will need to be granted for your token.
- [x] api
- [x] read_user
- [x] read_repository
- [x] write_repository
Click on Create personal access token.
Copy and Paste this token into the value for the Variable WVS_GIT_PERSONAL_ACCESS_TOKEN in your repo.
Usage
After your Repo Controller project is set up, you can trigger the flow at any time to sync your Plastic repository. If you are using the setup described above, you can trigger the flow manually with the manual trigger string in a commit message of a change Ex: -execute. We recommend starting with a version number in your README.md file and bumping that with each sync.
- In the WVS web, go to your Repo Controller project, select the README.md file, and click on Open in Web IDE.
- Make a small change in the readme. (bumping a version number, for example).
- Click Create Commit.
- In the Commit Message box, enter
-execute. - Click Commit to main branch and click Commit.
Your project should sync into your target repo (defined by WVS_NAMESPACE and WVS_PROJECT_NAME). If this is your first time running the sync, you should see a new project created with the name you gave for the new repository. If you don’t see your new project repo get created, double-check your variables.
Get Started
Head back to the WVS Bridge Page to get started.
Troubleshooting
For additional support, please reach out to us on our Discord.
Was this helpful?
We would love to hear your feedback, Submit a ticket in our Issue Tracker.