- Examining a Project’s History in WVS
- Project Information section
- Repository section
- Flow Status section
- Flow Outputs section
- Issues section
- Wiki section
Examining History
Examining a Project’s History in WVS
Wevr Virtual Studio (WVS) allows you to examine the history of your project. Here is how that’s done.
- Go to the Project Explorer using a web browser.
- Find the project you want to examine and click its name.
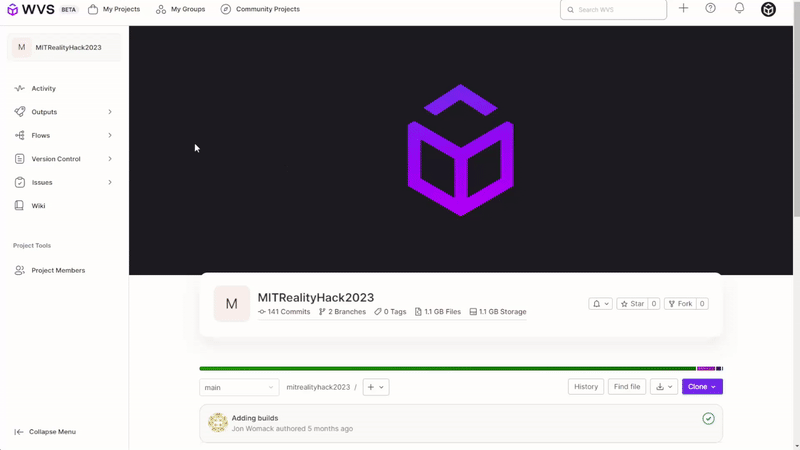
- You are taken to the project’s homepage.
- You can bookmark this page.
This homepage has several places to examine history. All the places that have history are listed and separated below. They are all main options on the left sidebar.
Project Information section
- Click Project information on the left sidebar. You are taken to the Activity section of Project Information.
Activity subsection
There are several useful bits of history found here.
- The Activity section has several filters at the top.
- All: Show all activity.
- Push events: Show only push events.
- Merge events: Show only merge events.
- Issue events: Show only issue events.
- Comments: Show only comments.
- Wiki: Show only wiki events.
- Designs: Show only designs events.
- Team: Show only team events.
- Click any text with a hyperlink to get more information about that part of the activity.
Project members subsection
- Click Members on the left sidebar. You are taken to the Project members subsection. It’s the other option under Project information.
Find user-related and group-related history here. This Project members page has several features.
- Examine Members and Groups histories by scrolling down to the area showing the list of members.
- Click Members or Groups to switch between them.
- Account: Column shows the member/group’s avatar, name, and handle(?) (what is the name for this thing with the @ symbol?).
- Source: Column shows how they became members or groups for this project.
- Access granted: Column shows when they were granted access and who granted it.
- The other sections don’t deal with history.
Repository section
A section about the repository of all the files making up the project.
- Click Repository on the left sidebar. You are taken to the Files subsection.
Files subsection
You’ll find the entire file repository here. You can dig into the history of any folder or file listed.
- Name: Shows the name of the folder or file. Click the folder to go to its contents. Click the file to view more on the file.
- Last commit: Shows the name of the last commit involving the folder or file. Click this commit’s name to see the details of this change.
- Last update: This shows when the folder or file was last updated.
Commits subsection
- Click Commits on the left sidebar. You are taken to the Commits subsection.
Commit history is found here.
- There are four options along the top row:
- Branch/tag dropdown menu: Choose which branch/tag to examine. The main branch is the default.
- Author dropdown menu: Choose which Author to examine. The default is Any author.
- Search by message box.
-
Commits feed: This button takes you to a page that shows a raw text feed of commits. Copy the URL of this page and paste it into a newsfeed reader to easily monitor your commits feed.

- The remaining rows show individual commits. They have separators that show which day they occurred and how many total commits were done on that day.
- Avatar icon: Shows who did the commit. You can click this icon to get more info on that user.
- Commit name: Click to get more info on this commit.
- Commit author name: Listed to the right of the Avatar icon. Also lists how long ago the commit was authored. Click the name to get more info on this author. It may link to an email for the author.
-
Pipeline test: Button may appear with how the Pipeline handled the commit.
- A green check mark shows that the Pipeline: passed this commit.

- Or it can show a red x and Pipeline: failed (what shows if a failure?).
- A green check mark shows that the Pipeline: passed this commit.
-
Commit SHA: This is a Secure Hash Algorithm (SHA) for the commit.
Example:

-
Copy commit SHA: Button that lets you copy the Commit SHA.

-
Browse Files: This button takes you to a page of the files involved in the commit(? need more info on exactly what is showing).

Branches subsection
- Click Branches on the left sidebar. You are taken to the Branches subsection.
Various types of project branch histories are found here.
- There are various history-related things on the top row:
- Overview: Click to get an overview of the branches in the project.
- Active: Click to filter for all active branches.
- Stale: Click to filter for all stale branches.
- All: Click to filter for all branches.
- Filter by branch name: A search box allows filtering by a typed branch name.
- The remaining rows show individual branches.
- Branch name: Click to get more details on the branch. To the right of this name, there is a colored text bubble telling you the status of the branch. Usually, it should show “merged” in blue text and a light blue bubble.
- ?SHA Hash name?: Shown under the branch name. To the right of the name, it tells you what happened and how long ago it happened. Click to get more info on this ?SHA Hash name?.
-
Commits behind/ahead: Listed as two numbers to the branch’s right. The first number is how many commits this branch is behind the main branch.
- Commits behind: The first number is how many commits of this branch are behind the main branch.
- Commits ahead: The second number is how many commits of this branch are ahead of the main branch.
-
Pipeline test: Button may appear with how the Pipeline handled the commit. Here are the possibilities:
- A green check mark shows that the Pipeline: passed this commit.
- A red “X” and Pipeline: failed (what shows if a failure?).
- A green check mark shows that the Pipeline: passed this commit.
- Compare: This button takes you to the Compare subsection. It shows a comparison to the main branch. More info on this page is found below under the Compare subsection. Example:
- At the page’s bottom, you can choose to view other branches that didn’t fit on the first page.
- There are no more history-related items here.
Tags subsection
- Click Tags on the left sidebar. You are taken to the Tags subsection.
Tag history is found here. Tags give the ability to mark specific points in history as being important.
- There are three options along the top row:
- Filter by tag name: A search box allowing you to type any tag name.
-
Sort dropdown menu: Three options for sorting the tags:
- Name: TBD
- Oldest updated: TBD
- Last updated: TBD
-
Tags feed: This button shows a raw text feed of tags. This button takes you to a page that shows a raw text feed of tags. Copy the URL of this page and paste it into a newsfeed reader to easily monitor your tags feed.
- TBD: TBD. The projects I’ve seen don’t have any more Tags subsection info.
- There are no more history-related items here.
Contributors subsection
- Click Contributors on the left sidebar. You are taken to the Contributors subsection.
Contributor history is found here. There are a series of graphs showing commits over time.
- Branch dropdown menu: You can click the dropdown and choose the branch you want to see a graph of its commit history. The default choice is the main branch.
- Commits to main graph: This shows the total number of commits to the main branch over time.
- The remaining graphs are user-specific versions of this data.
Graph subsection
- Click Graph on the left sidebar. You are taken to the Graph subsection.
You get a graphical timeline here.
- Graph dropdown menu: You can click the dropdown and get a graphical timeline of any branch. The default choice is the main branch.
- Git revision search box: Search by Git revision.
- Begin with the selected commit checkbox: Option to start from the commit you have selected (? How to select a commit?)
- You can click any red dot in the graphical timeline to go to that specific commit’s details.
Compare subsection
- Click Compare on the left sidebar. You are taken to the Compare subsection.
This area lets you compare Git revisions. Choose a branch/tag (for example, main) or enter a commit (for example, 4eedf23) to see what’s changed or create a merge request. Changes are shown as if the source revision was merged into the target revision.
-
Source box.
- Project dropdown: Defaults to the current project. (deactivated for the Target box).
- Branch dropdown: Defaults to the main branch.
-
Target box.
- Project dropdown: Defaults to the current project.
- Branch dropdown: Defaults to the main branch.
- Compare button: Click to compare the Source and Target project-branch combos. You are taken to a comparison screen showing all the commits that differ. The modifications, additions, and deletions are also shown.
- Swap revisions button: Swaps the Target and Source boxes.
Flow Status section
A section showing detailed flow status.
-
Click Flow Status on the left sidebar. You are taken to the Flow Status section.
- There are four filter options along the top row. The number of each is shown to the right of their name.
- All: Click for all flow statuses.
- Pending: Click for all statuses for pending flows.
- Running: Click for all statuses for running flows.
- Finished: Click for all statuses for finished flows.
- The rest of the rows give detailed info for each flow. Here are details for each column dealing with flow history.
-
Status: This shows the status of the flow. Here are the different statuses:
- passed: Click for all flow statuses.
- canceled: Click for all statuses for pending flows.
- failed(?): Perhaps another status(?), perhaps there are other statuses???
- Name: Is the flow name. Click flow name for more info about that flow.
- Job: Shows the job number, branch name, and commit name. Click the branch name for more branch info. Click the commit name for more commit info.
- Pipeline: Gives the pipeline number and who created it. Click the number for more pipeline info. Hover the mouse over the avatar icon to get the creator’s name. Click the avatar icon for more info on the creator.
- Stage: Gives the stage for the flow.
- Duration: Shows the time it took to run in hours:minutes:seconds. Below this is how many days ago this happened.
- Coverage: TBD. Unsure what this should show. It’s currently empty.
- Retryflow button: Click to retry the flow (?).
-
Status: This shows the status of the flow. Here are the different statuses:
- There are no more history-related items here.
Flow Outputs section
A section specializing in showing flow outputs. (Currently reports “No jobs to show”. I will need more info on this section.)
Issues section
A section showing the history of all the issues logged for this project using WVS’s issue tracker.
List subsection
- Click Issues on the left sidebar. You are taken to the List subsection of the Issues section.
Boards subsection
- Click Boards on the left sidebar. You are taken to the Boards subsection. (Currently empty. I will need more info on this section.)
- Board dropdown menu: Click to choose the board to view, search a board, or Create new board.
- Search or filter results… box: Search or filter.
- Edit board section: Edit the current board. There are several options like adding new issue statuses beyond the defaults of Open and Closed.
- Open section: Lists all open issues.
- Closed section: Lists all closed issues.
Wiki section
A section dealing with documentation for the project. The history of the project can be documented and found here.
Nothing else deals with examining history on this page or elsewhere (TBD).